Managing petty cash expenses can be a complex challenge, particularly when it involves multiple departments, remote workers, and physical receipts. However, the CHIP Expense is designed to streamline and automate the processes of petty cash payment, allocation, tracking, and reporting.
This blog post explores the benefits of the CHIP Expense platform and how it can enhance your business operations.
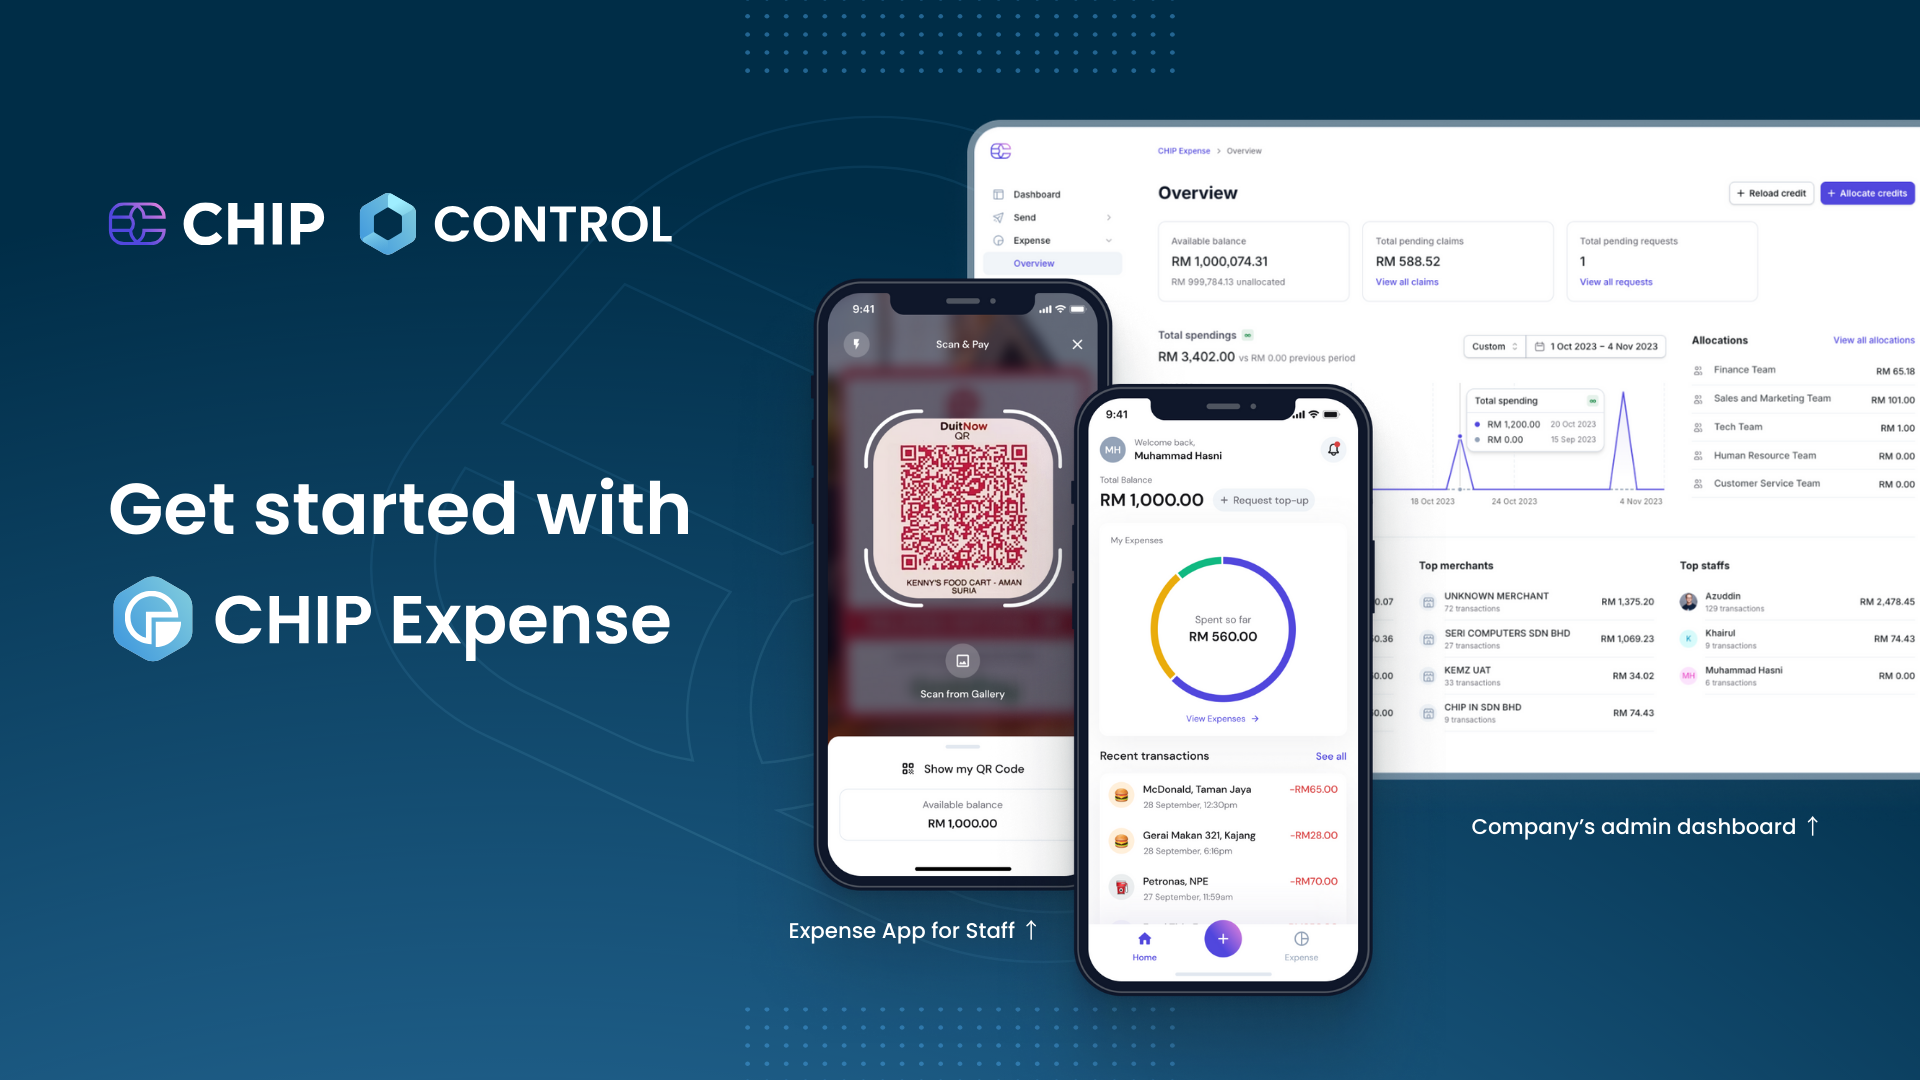
What is the CHIP Expense platform?
CHIP Expense features both a secure mobile application for employees and a comprehensive web application for administrators, making it a versatile tool for managing and tracking your team’s expenses from any location.
This integrated approach not only saves significant time on administrative tasks but also streamlines processes, minimizes redundancy, and promotes a paperless environment.
Key Features
- QR Code Payments: Scan and make payments via QR, using allocated amounts.
- Automated Data Extraction: Automatically extract and match receipt data with transactions.
- Expense Categorization: Assign categories and tags to your expenses easily.
- Expense Reports: Create, submit, approve, or reject expense reports from your dashboard.
- Multi-Device Access: Access your data from any device and sync across multiple platforms.
Necessary Prerequisites
To fully leverage the capabilities of the CHIP Expense app, it is important to complete a few key prerequisites:
- Complete the CHIP Merchant Onboarding Form: If you are new to CHIP, start by filling out the CHIP Merchant Onboarding Form. During this process, ensure you select “CHIP Expense” under the Control module selection. This step is crucial as it enables access to the expense management features of the app.
- Receive Your CHIP Control Account Welcome Email: After your account is activated, you will receive a welcome email. This email is vital as it contains essential information and credentials needed to access the CHIP Expense app.
Note: If you haven't yet obtained CHIP Control account access, you can sign up for free at CHIP Onboarding. This is especially important for new users who are just starting with CHIP. For existing CHIP Merchants who did not select the Expense feature during the initial onboarding, it is possible to activate this feature by contacting the CHIP Merchant Services unit. This can be done via the designated WhatsApp group or by email.
1. Admin Dashboard: Set Up Your Team
To begin setting up your team on the CHIP Expense app, start by signing into your Admin dashboard at CHIP Control portal.
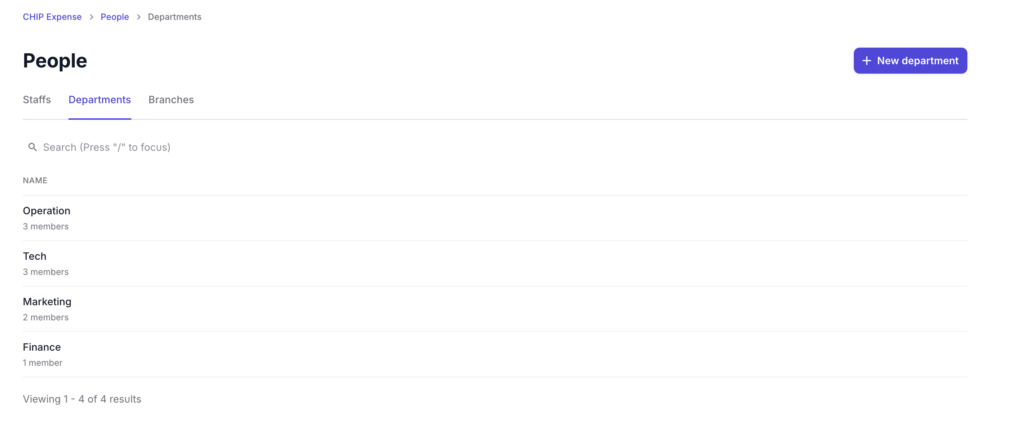
Once logged in, proceed to the “People” section where you can invite your team members by clicking on “Add Staff.” Input the necessary email addresses, and your team will receive an invite to download the CHIP Expense mobile app.
Additionally, you should add new departments through the “Departments” tab to ensure that expense management is organized according to your company’s structure.
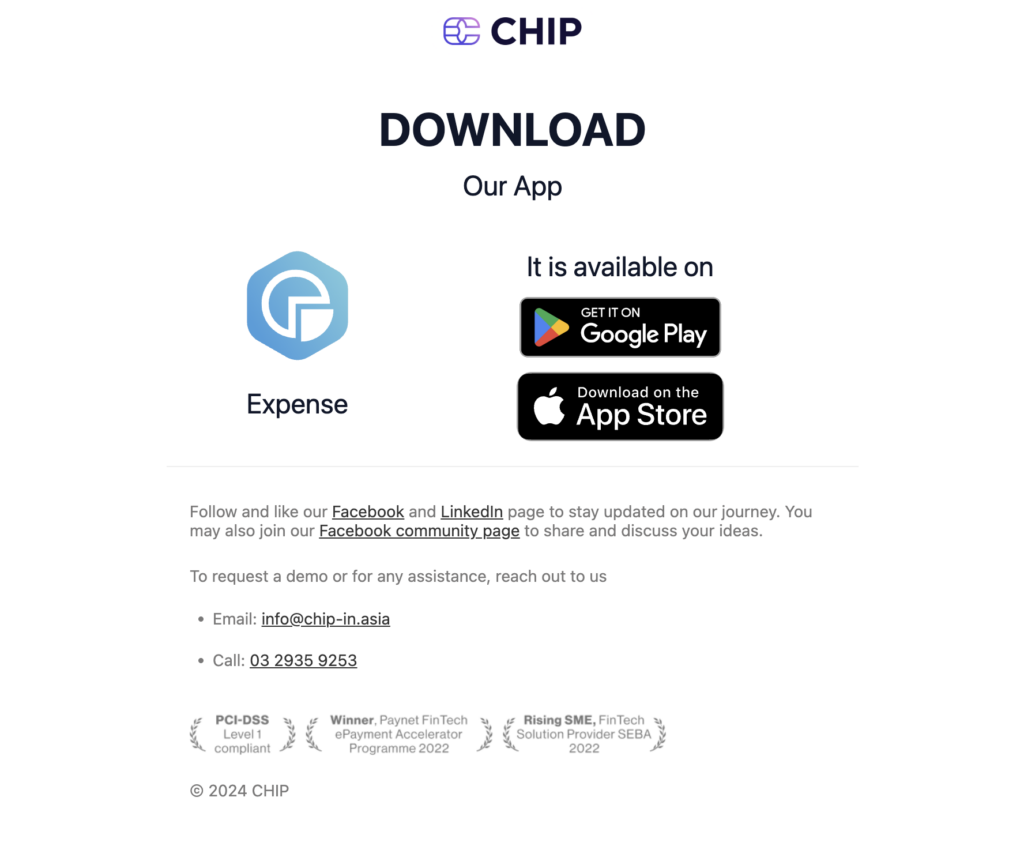
Note: Only staff members or employees whom you have added and granted access to can log in to the CHIP Expense Mobile App, which is available for download from the App Store or Google Play.
2. Admin Dashboard: Set Credit Allocation
To set up credit allocations for your team on the Admin dashboard, start by clicking the “Reload Credit” button located on the top right side of the screen.
It’s necessary to reload credit before you can assign specific petty cash amounts to individual departments.
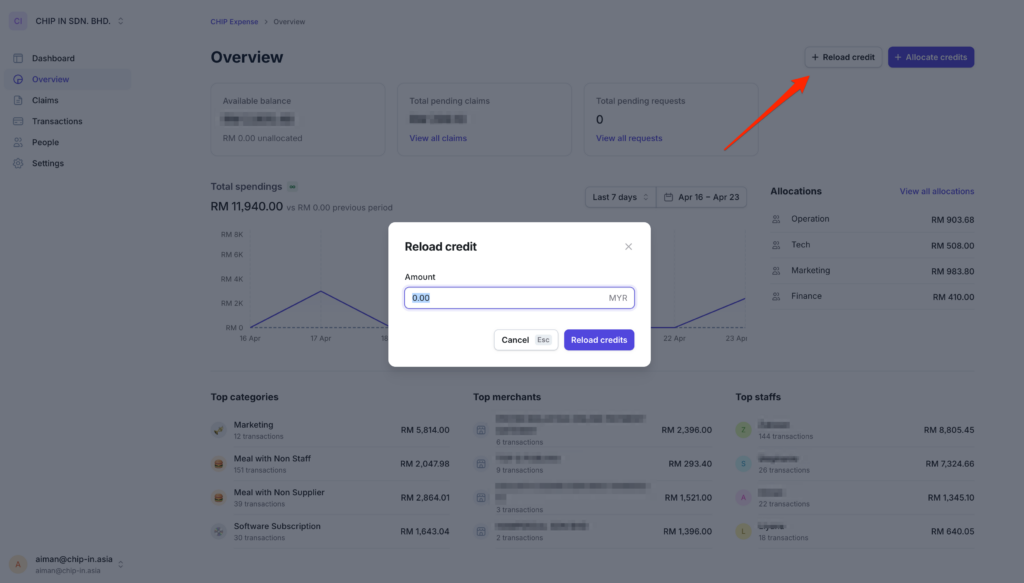
After the credits are reloaded, you will use the “Allocate Credits” button, situated next to the reload credit button, to distribute the funds to the respective departments.
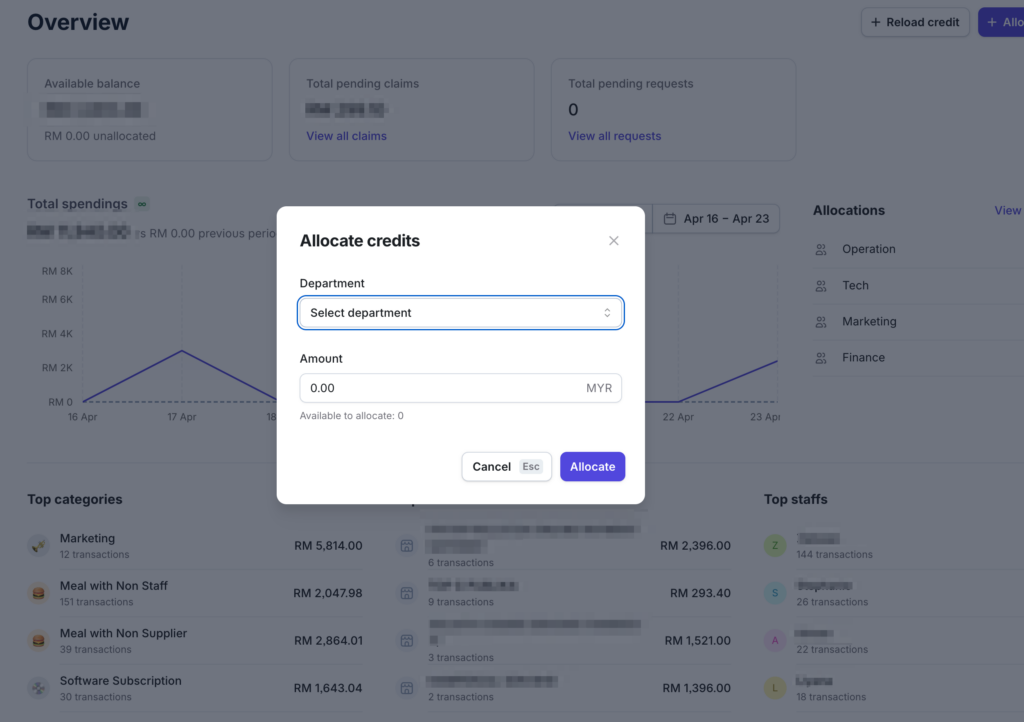
With the credits allocated, both you and your team are equipped to use these funds for business-related expenses.
3. Mobile App: Install and Launch
Upon receiving an email invitation, employees should download the CHIP Expense mobile app from the Apple App Store or Google Play.
After downloading, they must log in using the email address that was registered by the admin. This ensures that each user’s access is securely managed and linked to their official credentials.
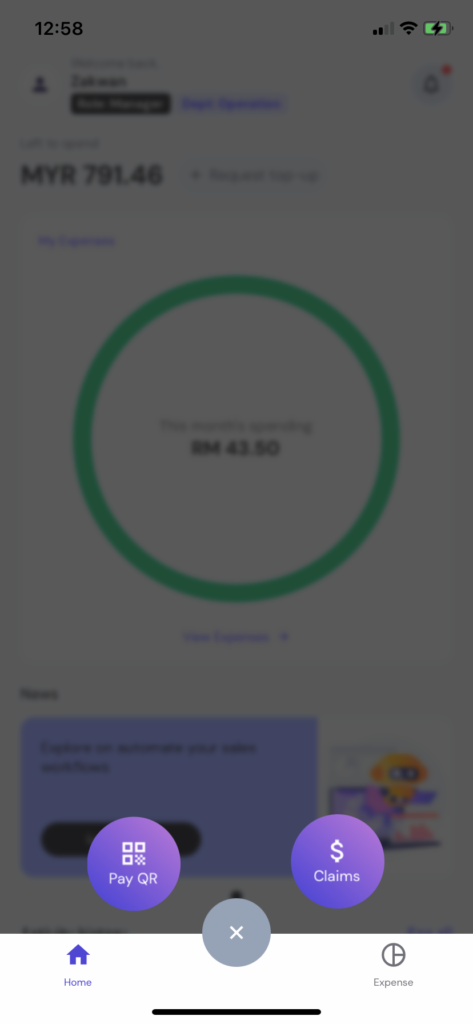
4. Mobile App: Make Payment or Submit Claims
When an employee needs to make a payment, they simply tap the “+” button in the middle of the app’s interface and select “Pay QR”. This allows them to scan a DuitNow QR code provided by any vendor or outlet.
Before confirming the transaction, the employee must quickly select the appropriate category for the purchase.
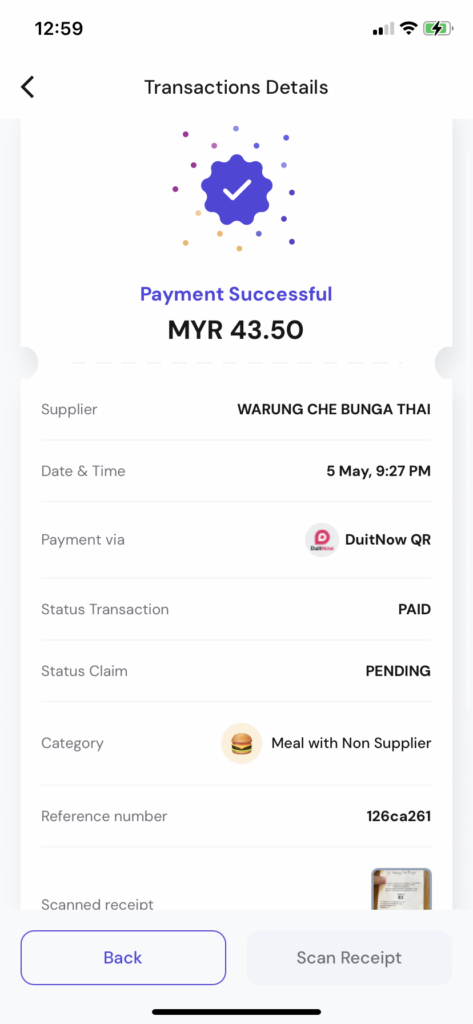
After the purchase is successful, the employee can scan and upload the purchase receipt directly to the app, streamlining the expense management process.
For purchases made outside of the app, such as those using a card or cash, the employee can tap the “+” button in the app and choose “Claims” to record the transaction.
They will need to upload the receipts corresponding to these purchases for later reimbursement by the company. This feature allows for easy tracking and management of out-of-app expenses, ensuring they are also captured and processed efficiently.
If you are seeking a straightforward and efficient method to manage your expenses, consider trying the CHIP Expense app today. Download it now to start saving both time and money.
For early access or any inquiries, please contact our team at [email protected], or reach out to our Merchant Service unit via your dedicated WhatsApp group. Please note that the product is currently in its Beta phase, and we welcome your feedback to improve its functionality.
Recommended related topic
SSM Statutory Documents: what have changed so far?
We’re always open to content contributions from our community. Join our Facebook Group and share your work or topic ideas to potentially be featured on our blog.
Don’t forget to like and follow us on our social media platforms if you haven’t yet. You can find us on Facebook, Twitter, Instagram, and LinkedIn. We appreciate your support! 🙂