Automation allows a small team to execute multiple tasks with similar, if not better, efficiency than a large team.
It is not rocket science to understand why Internet marketers, startup founders, and developers prefer solutions that provide API webhooks for custom reporting or connecting to other 3rd-party software.
Hence, CHIP Collect provides webhooks for 21 events which our merchants can utilize for custom workflows based on their business and operational needs:
1.  Purchase Paid
2.  Purchase Payment Failure
3.  Purchase Cancelled
4.  Purchase Hold
5.  Purchase Captured
6.  Purchase Released
7.  Purchase Preauthorized
8.  Purchase Recurring Token Deleted
9.  Purchase Subscription Charge Failure
10. Purchase Pending Execute
11. Purchase Pending Charge
12. Purchase Pending Capture
13. Purchase Pending Release
14. Purchase Pending Refund
15. Purchase Pending Recurring Token Delete
16. Payment Refunded
17. Payout Success
18. Payout Failed
19. Billing Template Client Subscription Billing Cancelled
20. Payout Pending
21. Purchase Created
You can take advantage of these webhooks using a 3rd-party webhook gateway or your proprietary web applications.
In this article, I will guide you on automating two example workflows based on the “Purchase Paid“ event.
This event means the CHIP server will send a message (webhook) to your server whenever a customer makes a payment.
The first example is to trigger emails automatically, and the second is to send out SMS notifications automatically.
Pre-requisite requirements
- Access to the CHIP Merchant Portal >> Developers Tab to set up and configure webhooks.
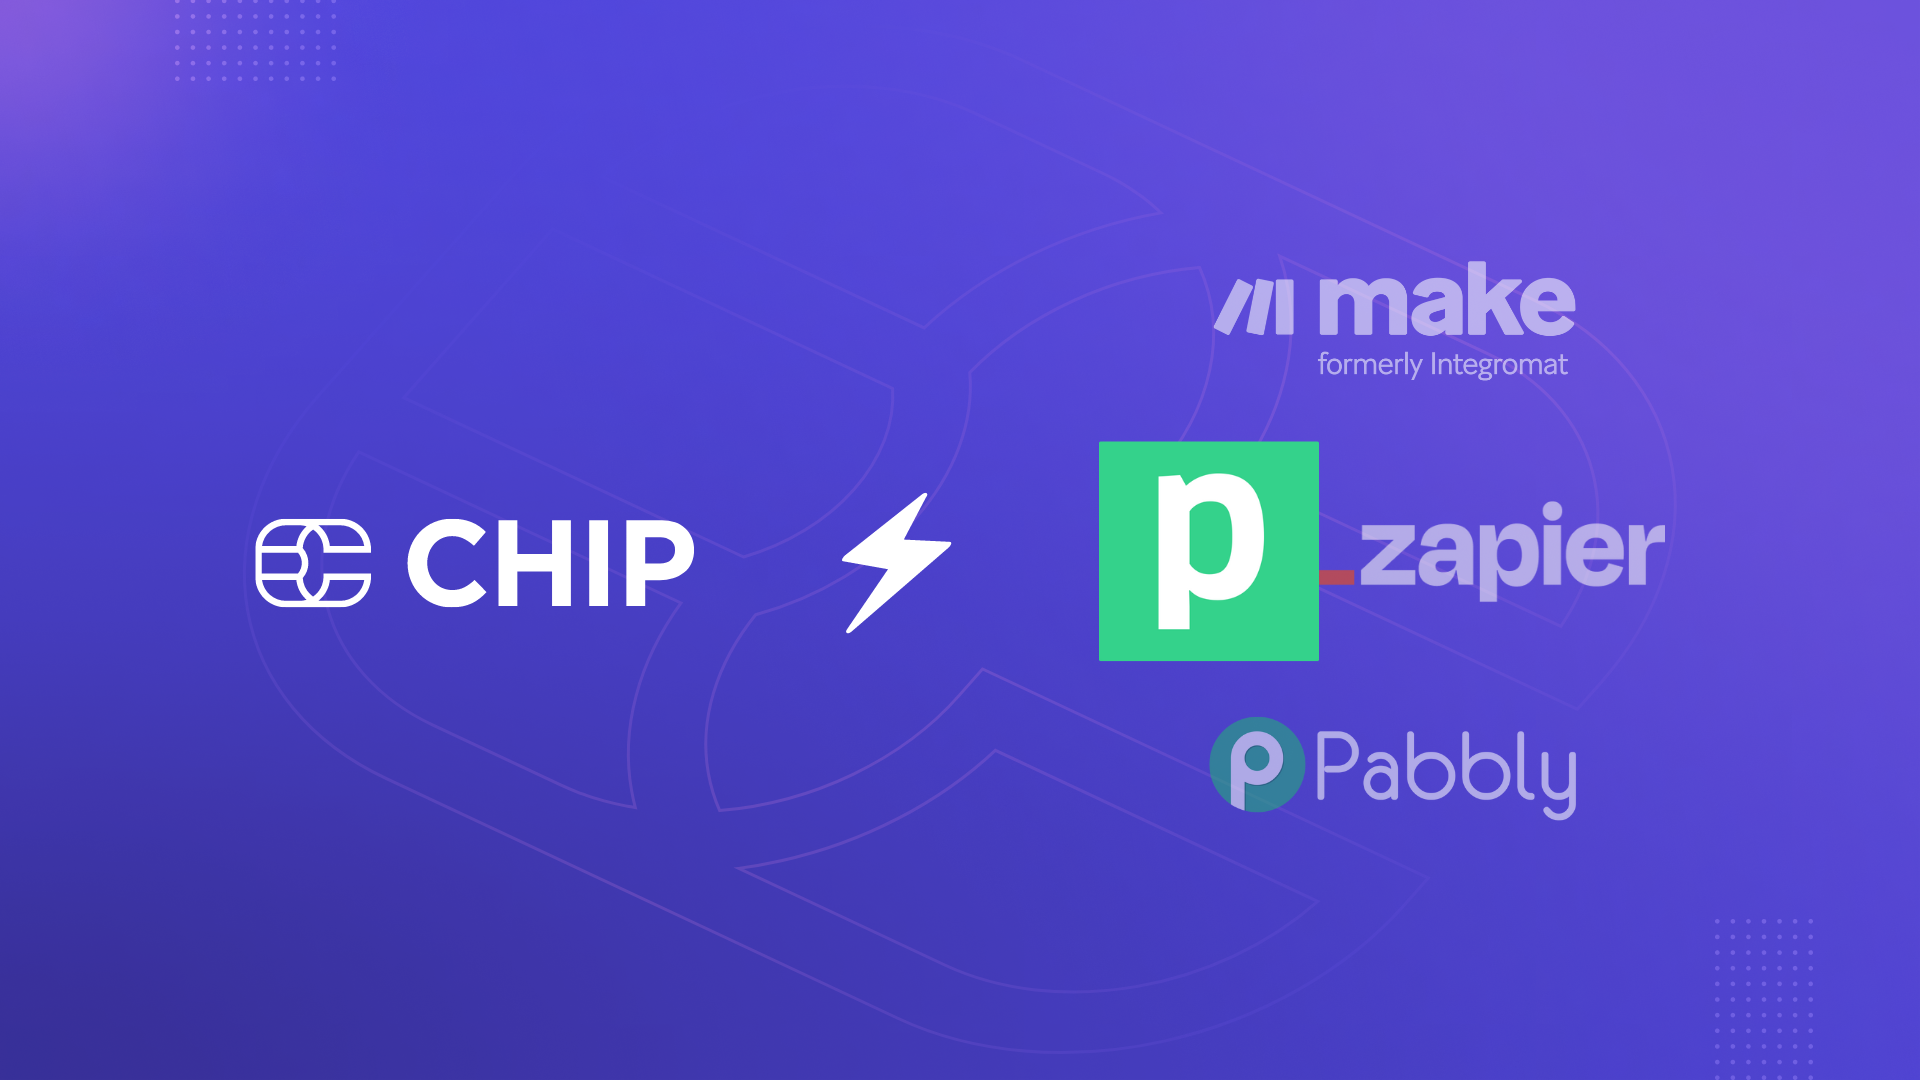
- Webhook gateway to receive and process webhooks. (I used Pipedream in this article. You can use Pipedream, Zapier, Pabbly, Make, or your proprietary web applications).
- SMS gateway to send SMS notifications. (I used Adasms in this article).
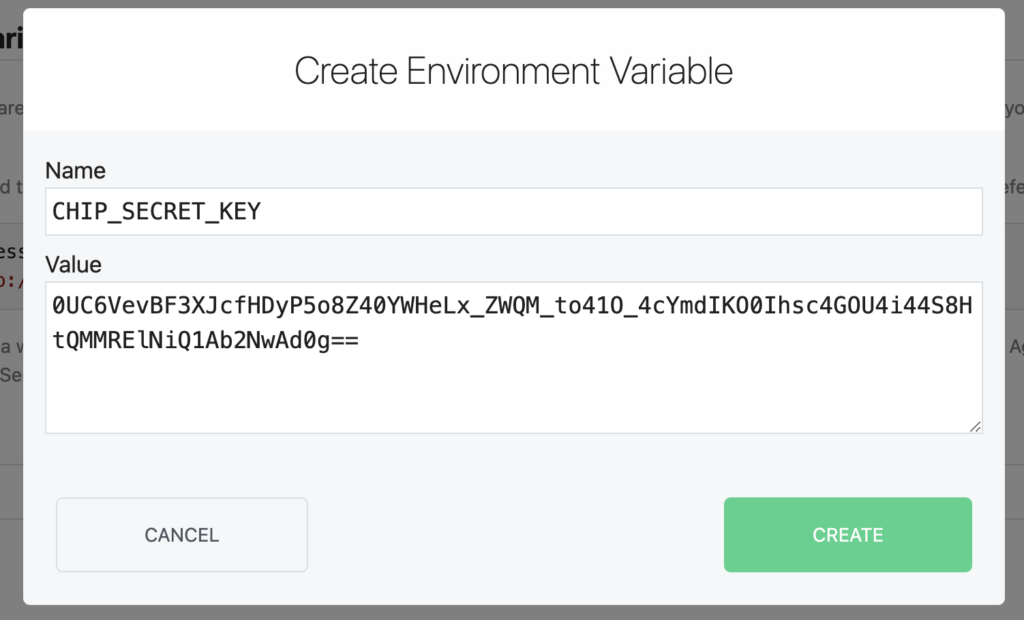
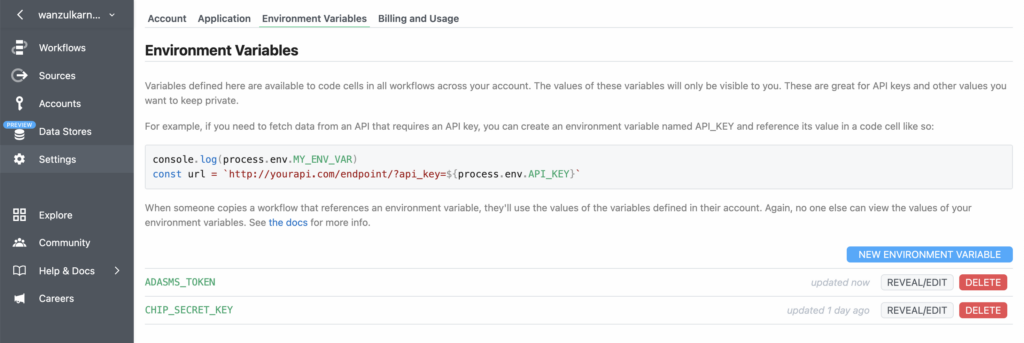
1. Set up Pipedream’s Environment
Log in to your Pipedream account and create an environment variable.
Set “CHIP_SECRET_KEY” as the name and your CHIP Private Key as the value. This step is crucial to skip from hardcoding the CHIP Secret Key into a code.
Note: You can obtain the CHIP Private Key from your CHIP Merchant Portal.
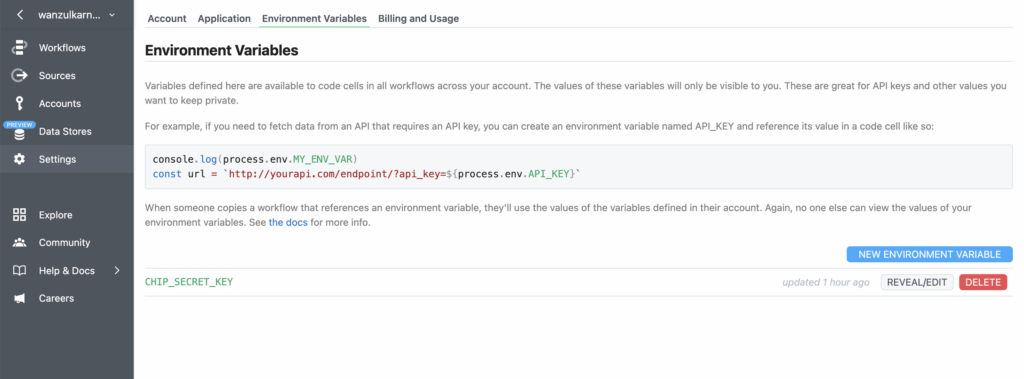
To send out SMS notifications, you need to create another environment variable. Set ADASMS_TOKEN with your Adasms Token.
Now, we are ready to move into setting up the workflows.
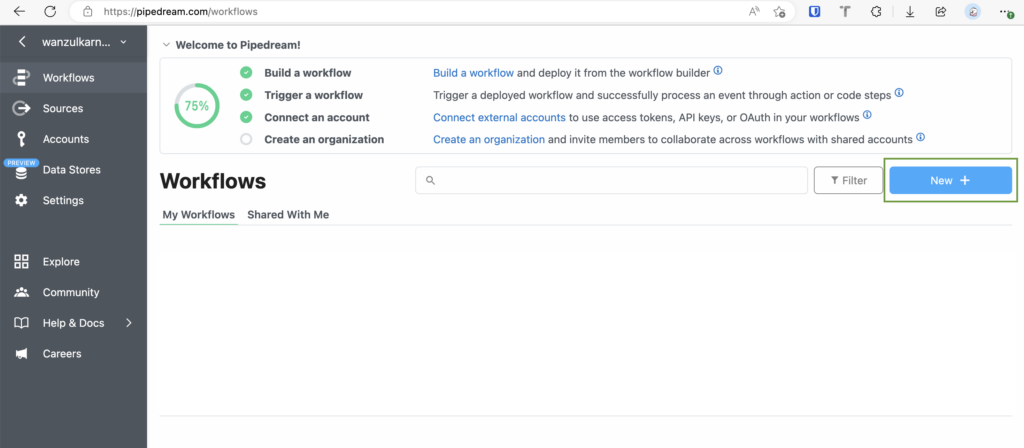
2. Set up Pipedream’s Workflows
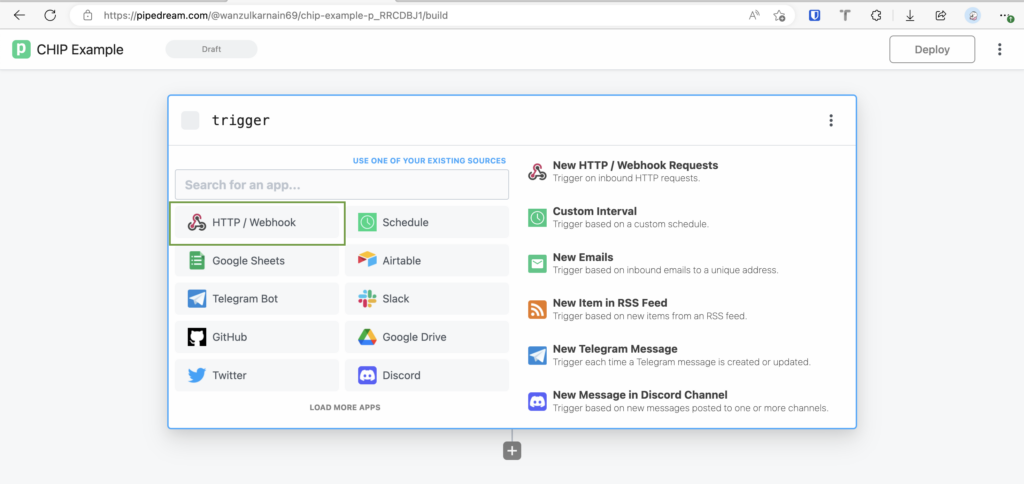
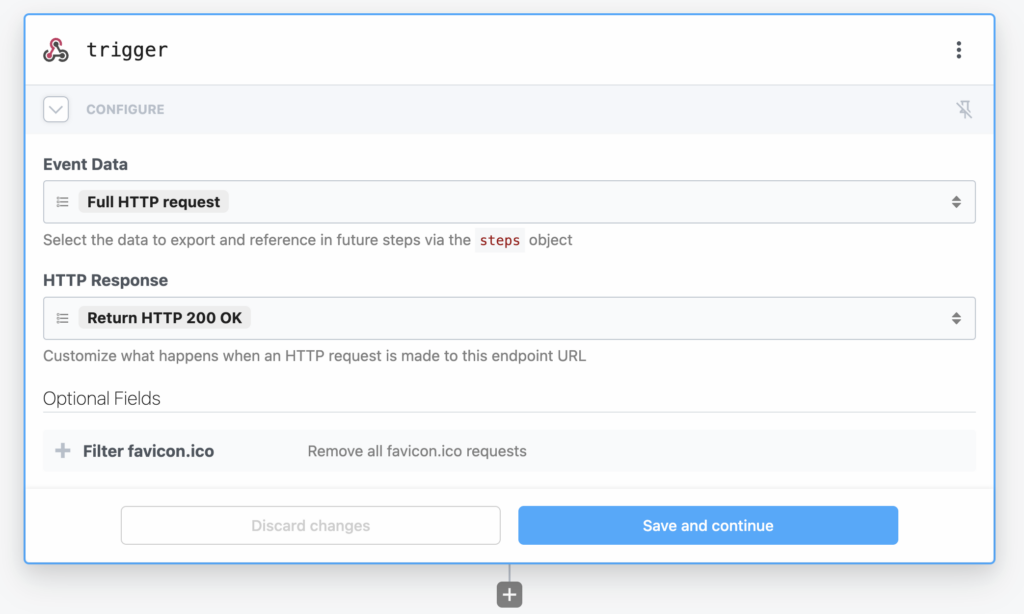
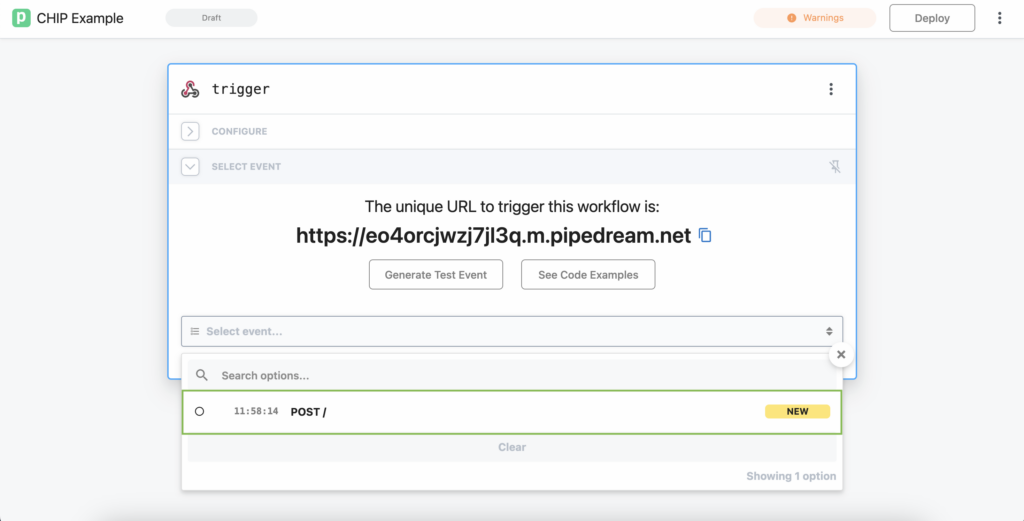
Navigate to Workflows and create a new Workflow.
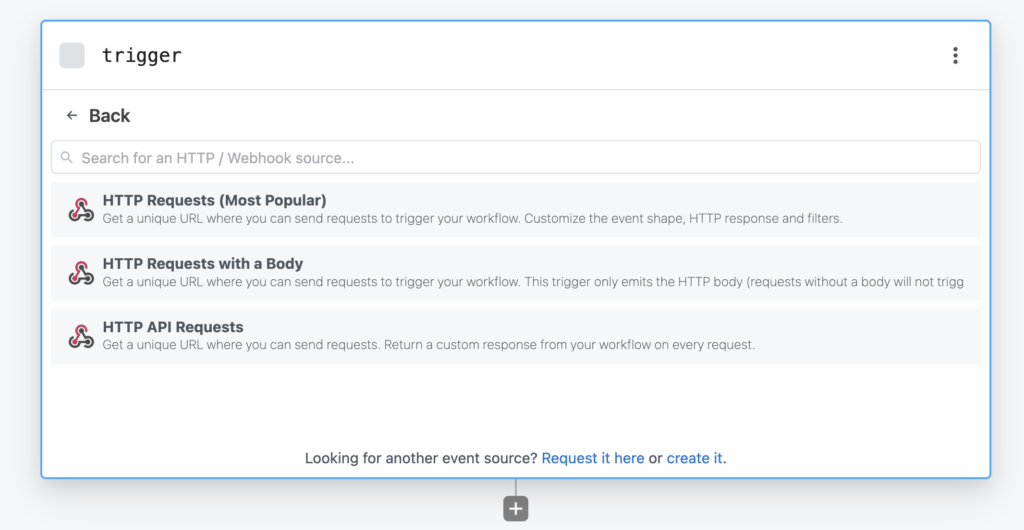
Choose HTTP / Webhook as the trigger to create a URL for the CHIP Merchant Portal setup in a later step.
Then, select HTTP Requests (Most Popular).
Click Save and Continue.
Pipedream will generate a URL.
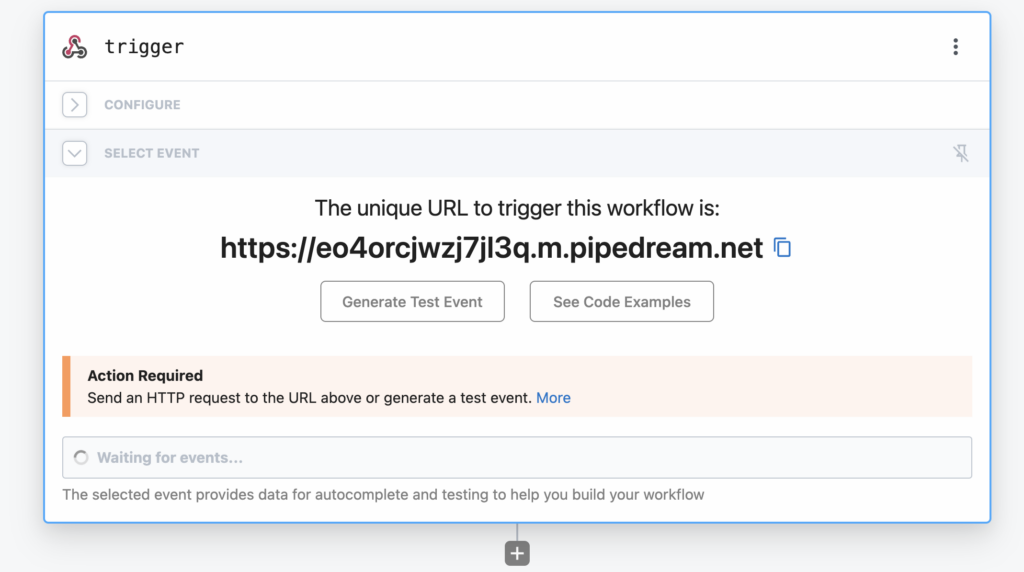
Leave the tab open. We will resume this step after we set up the webhooks in the CHIP Merchant Portal.
3. Set up CHIP Webhooks
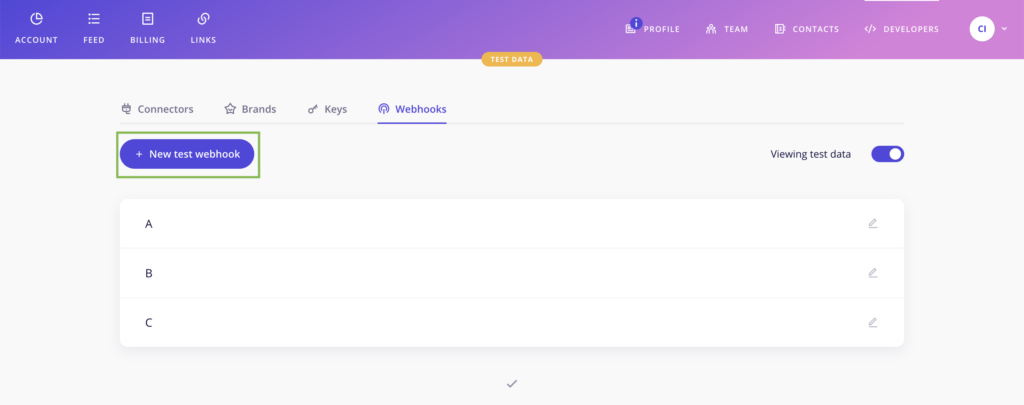
Log in to your CHIP Collect Dashboard >> Developers >> Webhooks >> New live webhook (if you are using test data, the label will be “New test webhook”).
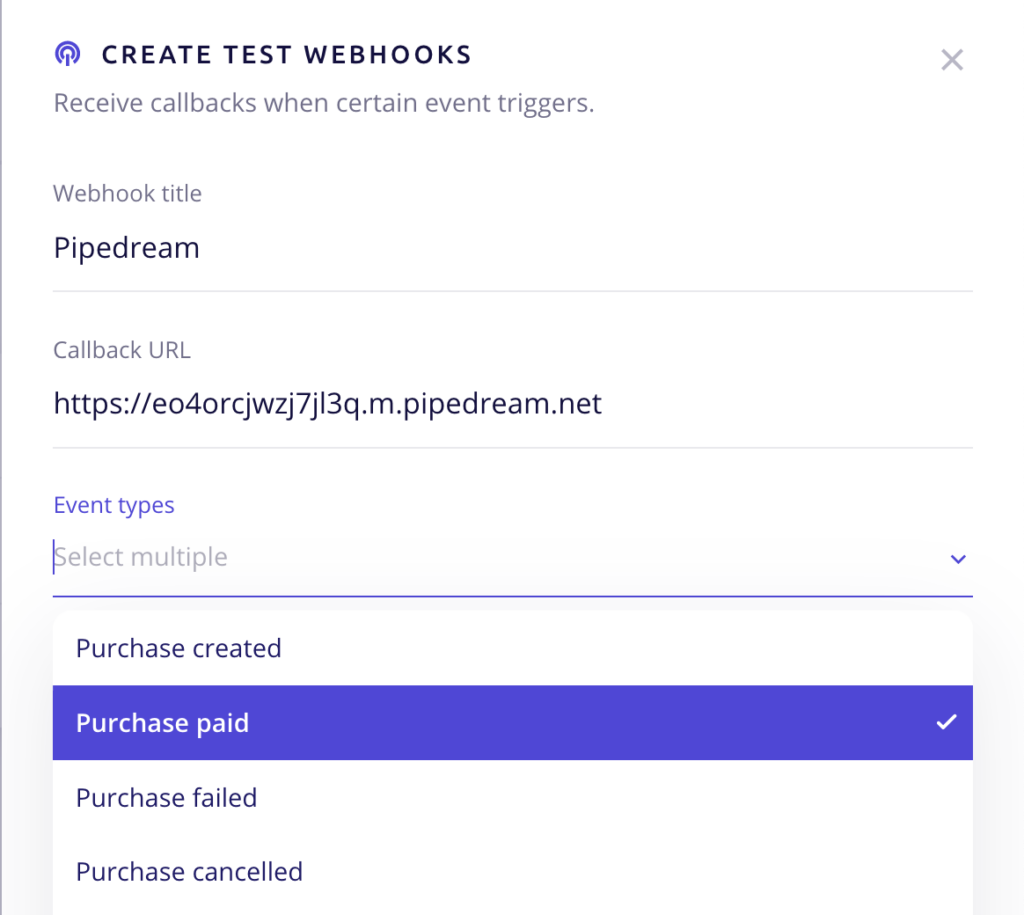
Set the webhook title as “Pipedream.”
To get the Callback URL, go to the browser tab with the URL generated by Pipedream. Copy the URL and paste it into the CHIP Webhook Callback URL placeholder.
Select “Purchase Paid” for the Event types.
Then, click the Create button.
You created your first CHIP Webhook!

4. Set up the Pipedream’s Trigger (1)
To ease the Pipedream event trigger setup, I triggered the “Purchase Paid” event once by creating a purchase and completing payment using CHIP Payment Link.
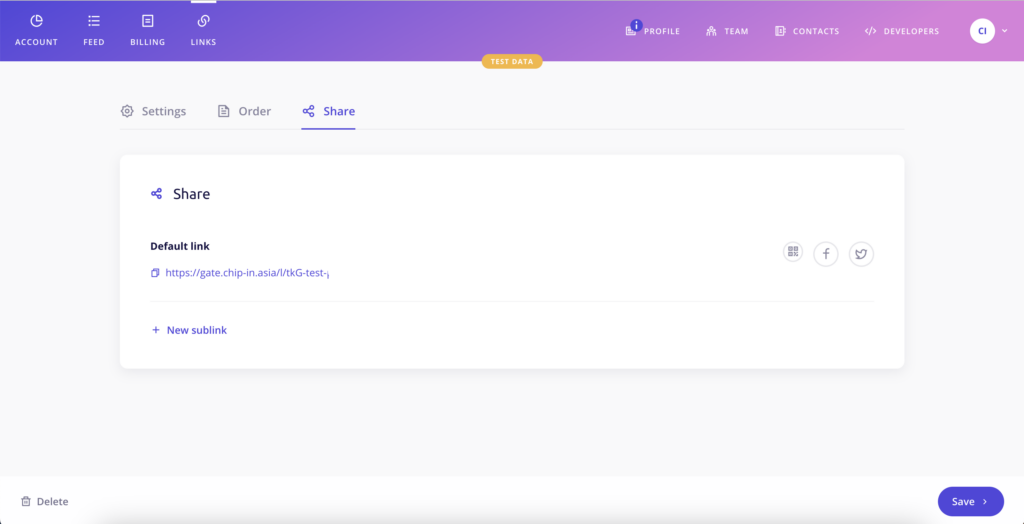
To do so, you need to create a Payment Link.
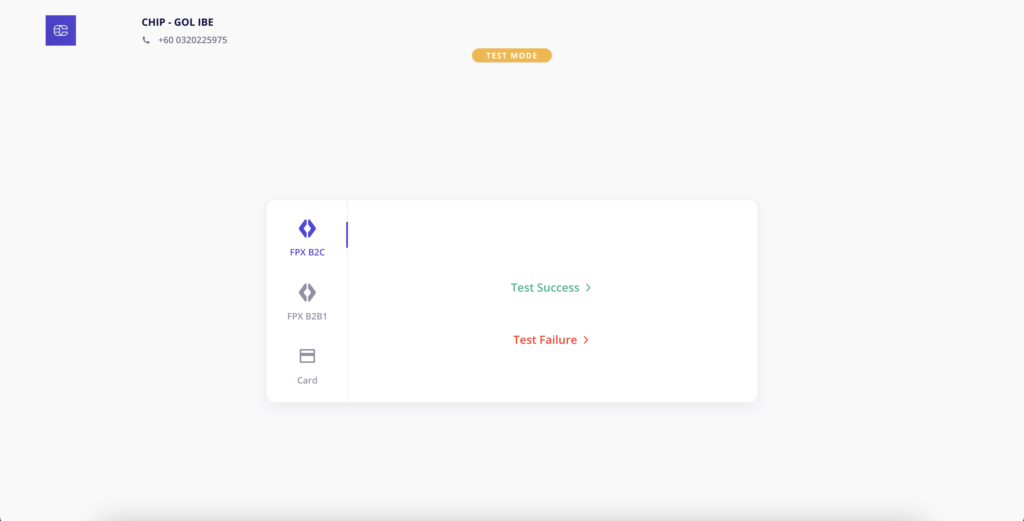
Start the test purchase process and proceed to make payment.
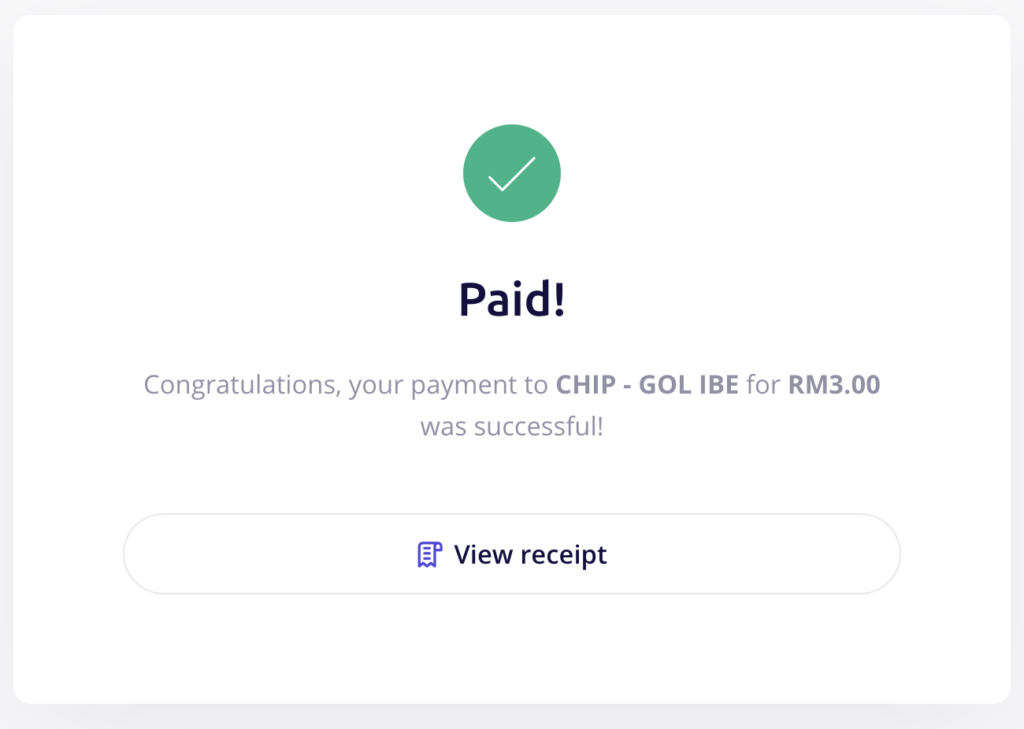
Payment successful.
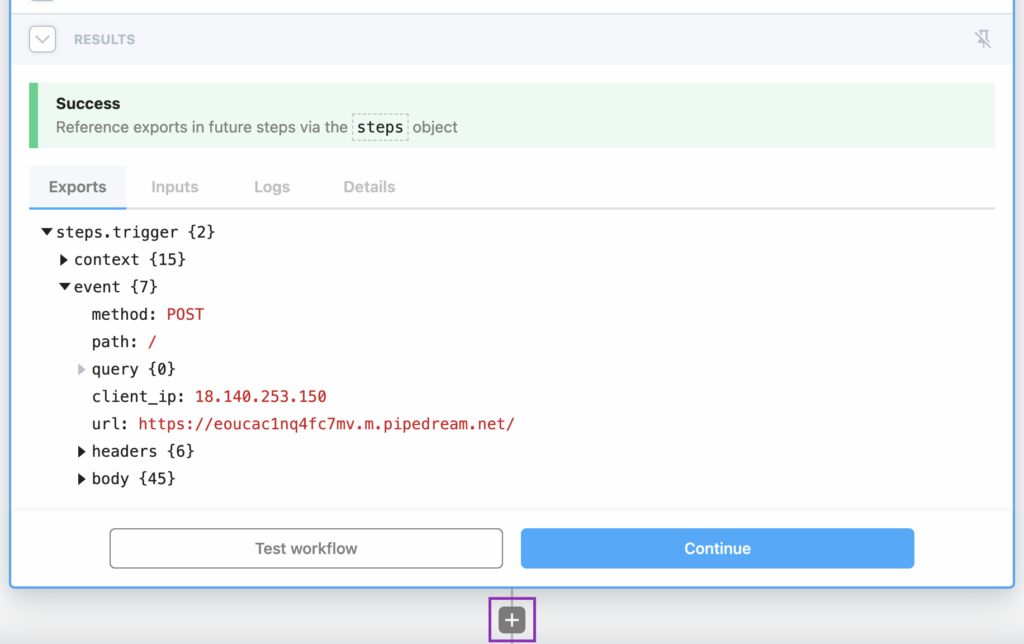
The Pipedream event triggers should already receive the notification event for “Purchase Paid” by now.
Choose the latest event received.
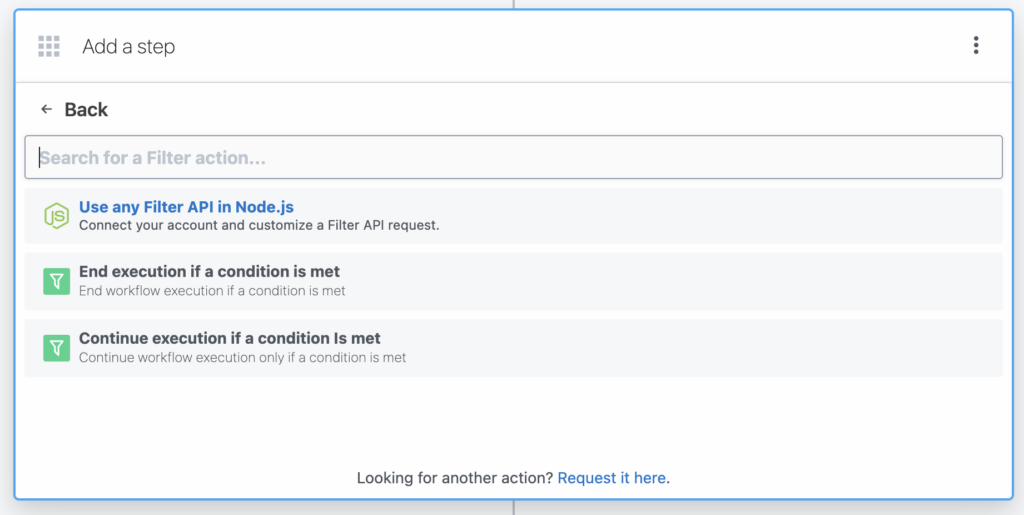
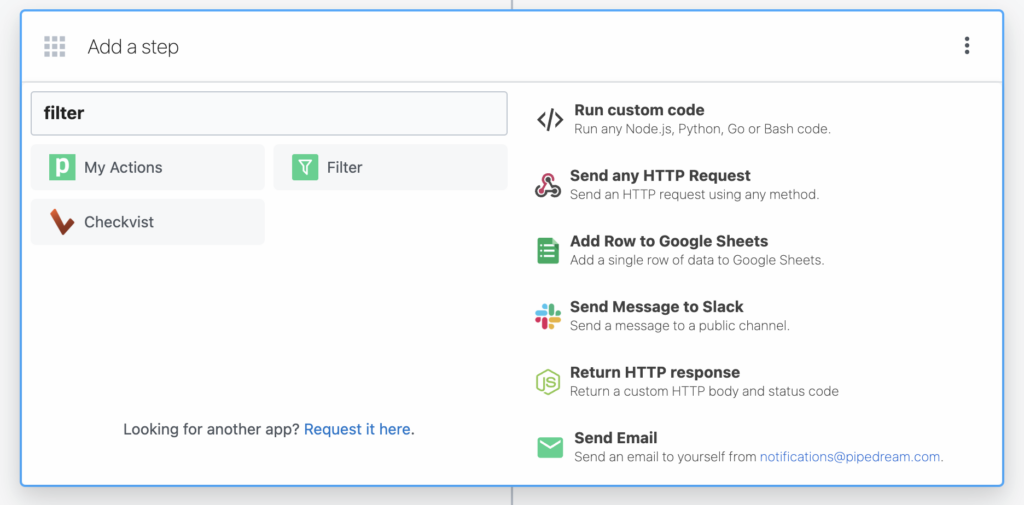
Click on the small plus (+) icon below the result display.
Then, search for the keyword ‘filter’ and choose Filter. This step is for terminating the workflow execution if the status is unpaid.

Select Continue execution if a condition is met.
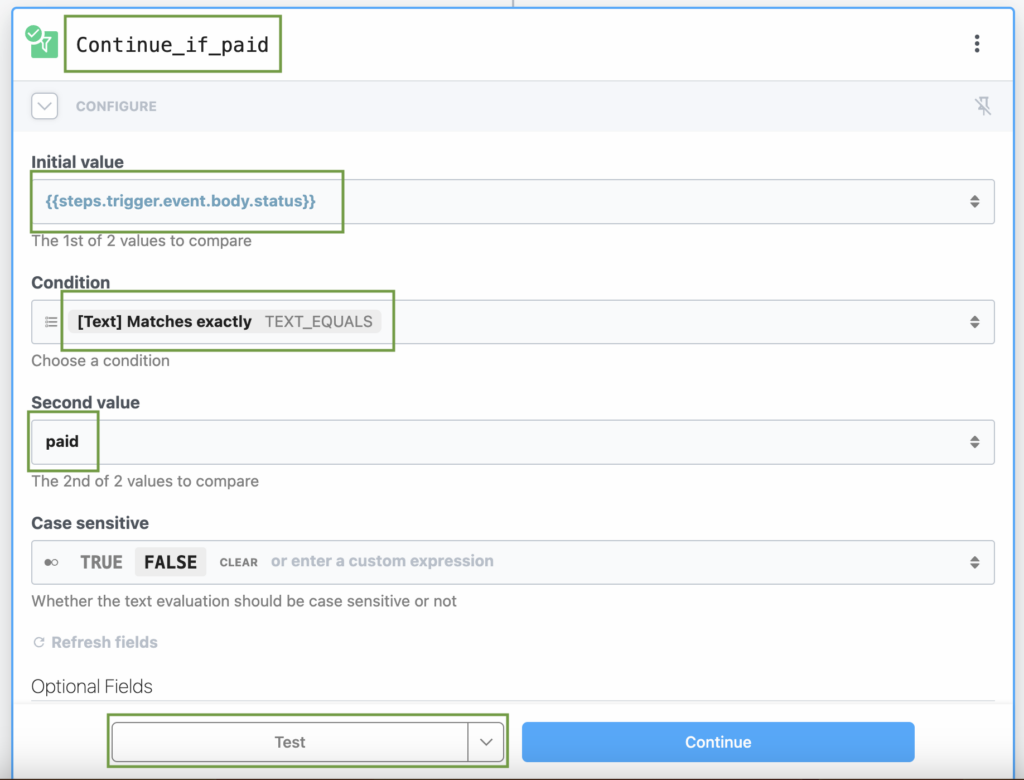
Next, set the Filter as the following:
- Name =
Continue_if_paid - Initial value =
{{steps.trigger.event.body.status}} - Condition =
[Text] Matches exactly - Second value =
paid
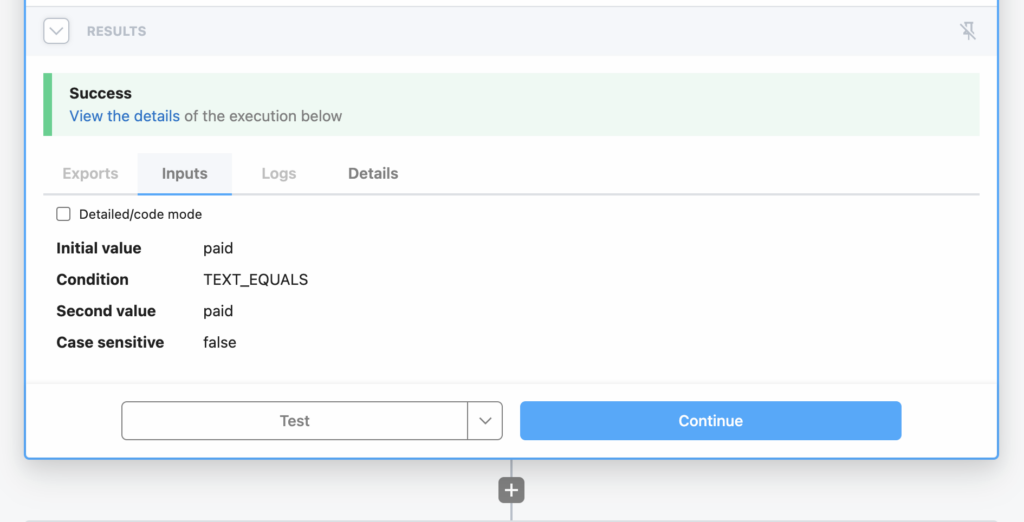
Then, click the Test button.
You should get a Success message. Then, click the small plus (+) button.
To proceed from here, you may choose to use the Code method or the No-Code method. If you prefer the latter, you can skip the Code method section below and scroll to the No-Code method section.
A. The Code method
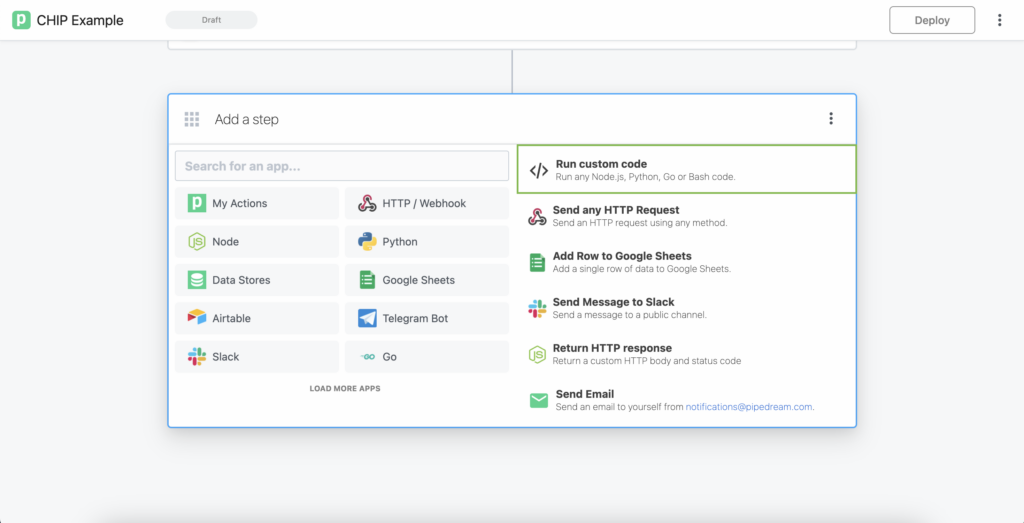
Add a step by selecting Run custom code.
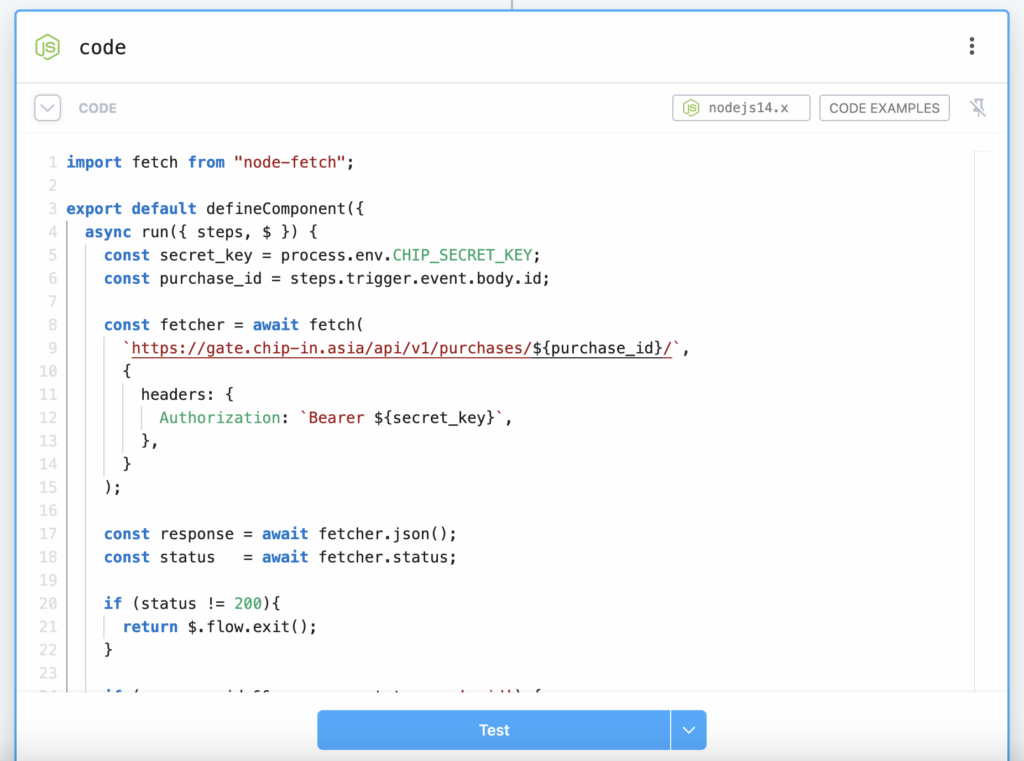
Copy and paste the code below. Then, click the Test button.
import fetch from "node-fetch";

export default defineComponent({
  async run({ steps, $ }) {
    const secret_key = process.env.CHIP_SECRET_KEY;
    const purchase_id = steps.trigger.event.body.id;

    const fetcher = await fetch(
      `https://gate.chip-in.asia/api/v1/purchases/${purchase_id}/`,
      {
        headers: {
          Authorization: `Bearer ${secret_key}`,
        },
      }
    );

    const response = await fetcher.json();
    const status   = await fetcher.status;

    if (status != 200){
      return $.flow.exit();
    }

    if (response.id && response.status == 'paid') {
      return response;
    }

    return $.flow.exit();
  },
})
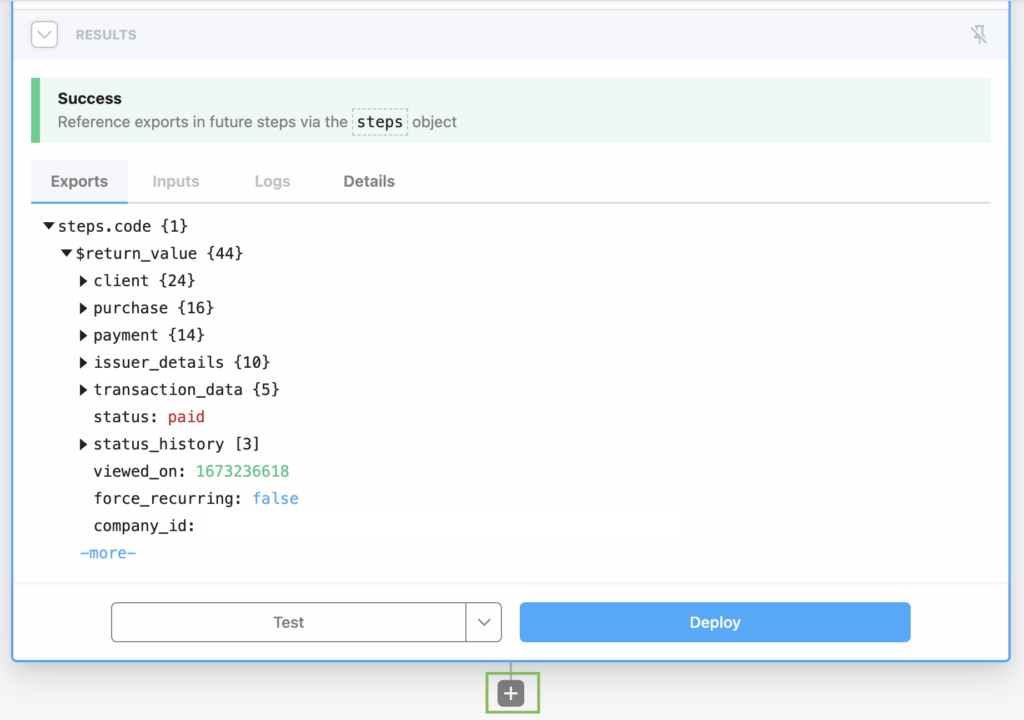
You should get a Success message. Then, click the small plus (+) button.
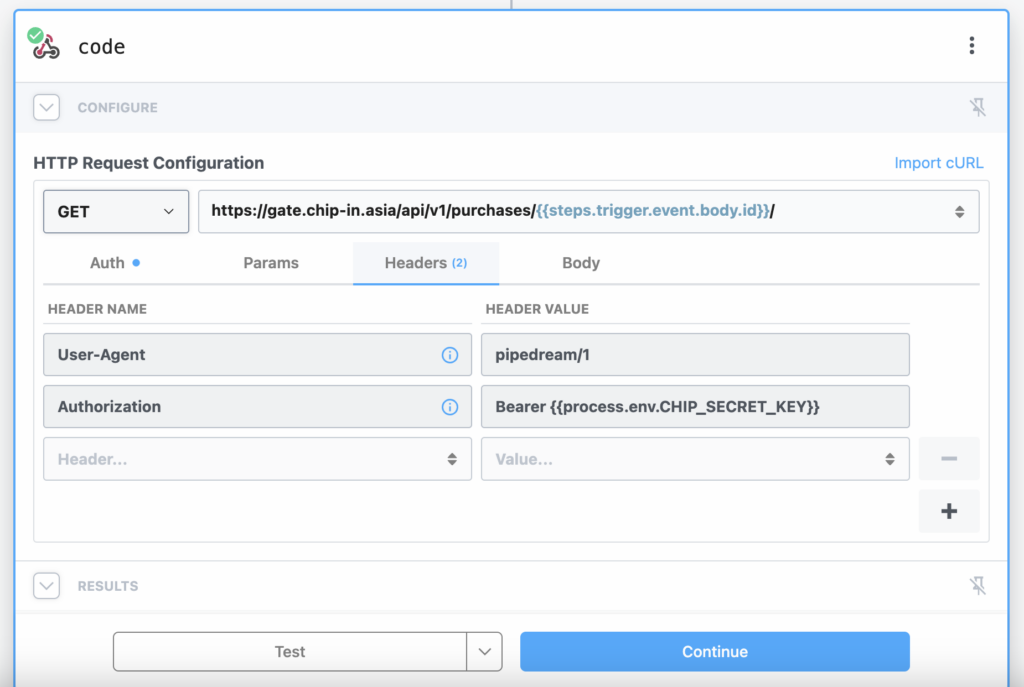
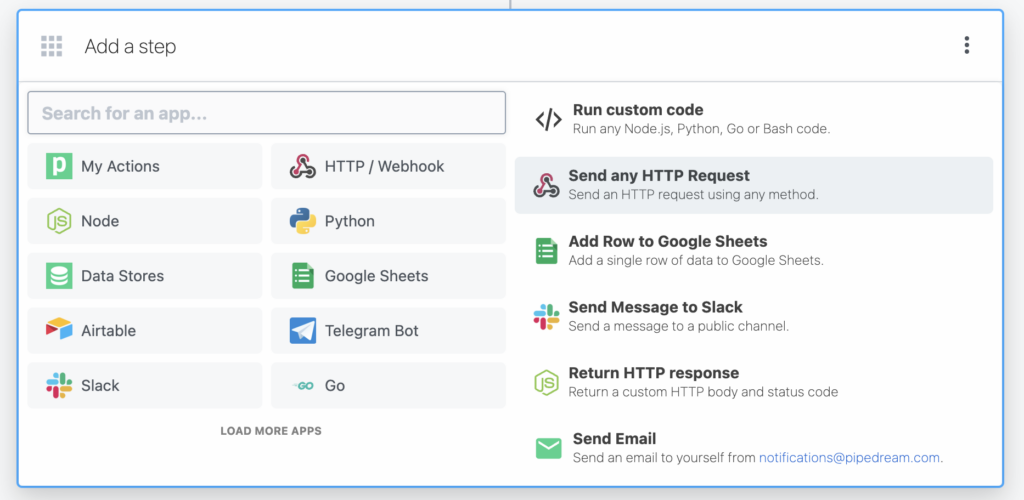
B. The No-Code method
Add a step by selecting Send any HTTP Request.

Next, set the step as the following:
- Name =
code - HTTP Request Configuration =
GET (value: https://gate.chip-in.asia/api/v1/purchases/{{steps.trigger.event.body.id}}/) - Authorization Type =
Bearer Token - Token =
{{process.env.CHIP_SECRET_KEY}}
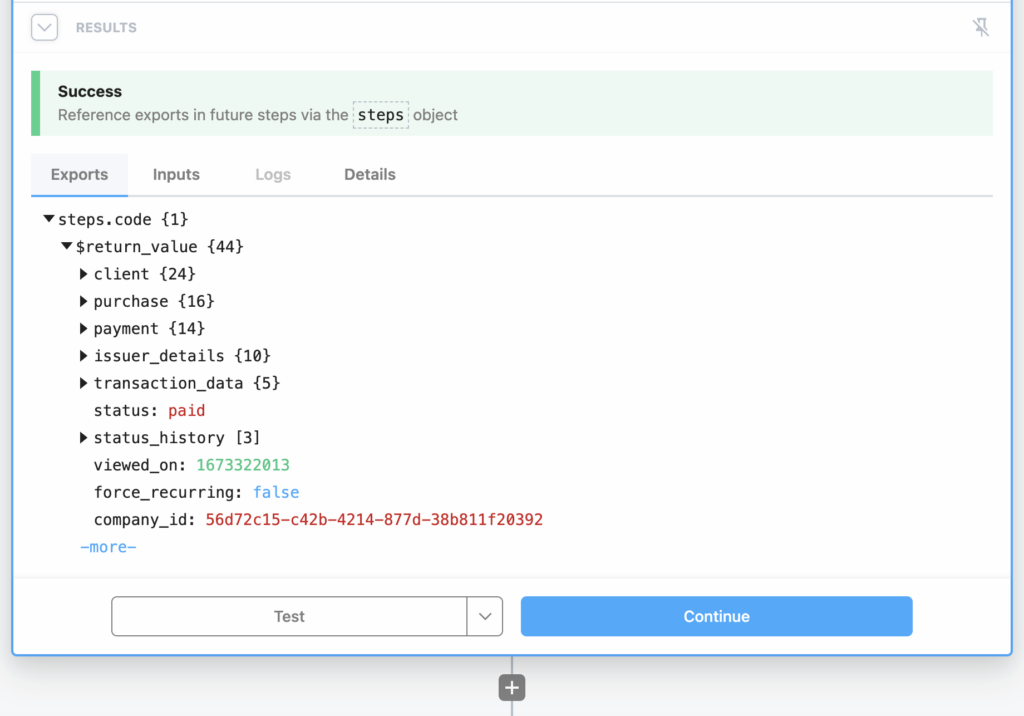
Then, click the Test button.
The Exports value will display as follows:
Then, click the small plus (+) button.
5. Set up the Pipedream Trigger (2)
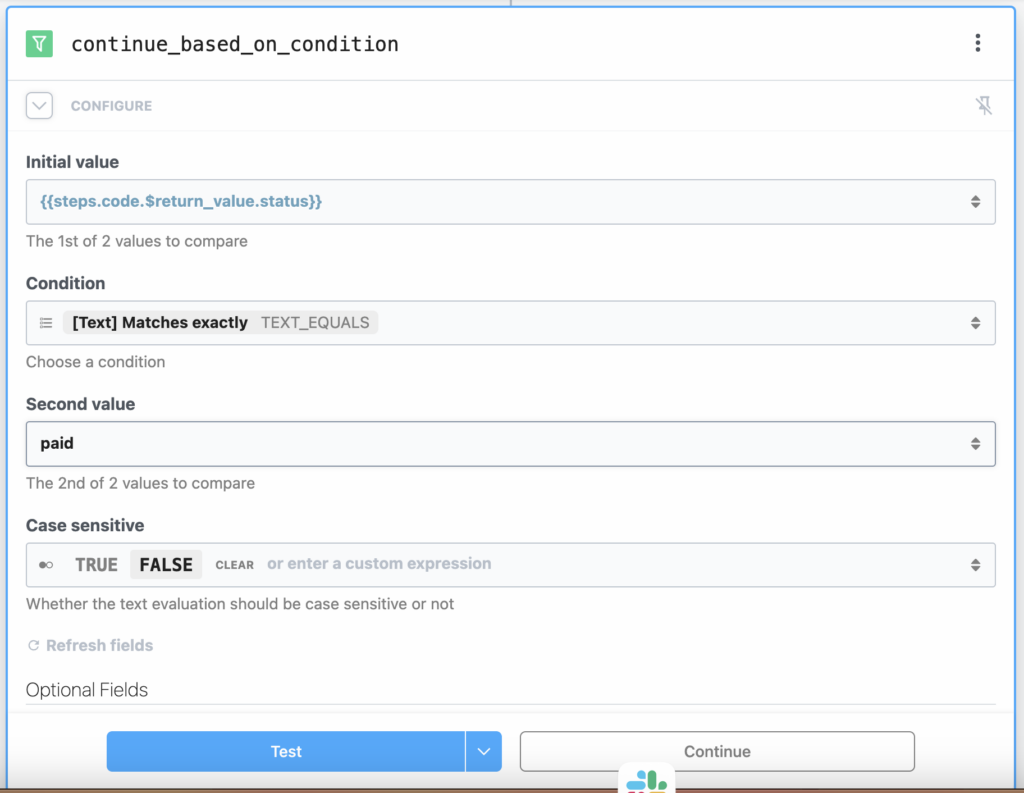
Then, search for the keyword ‘filter’ again and choose Filter. This step is an additional parameter for terminating the workflow execution if the status is unpaid.
Select Continue execution if a condition is met.

Next, set the Filter as the following:
- Name =
Continue_based_on_condition - Initial value =
{{steps.code.$return_value.status}} - Condition =
[Text] Matches exactly - Second value =
paid
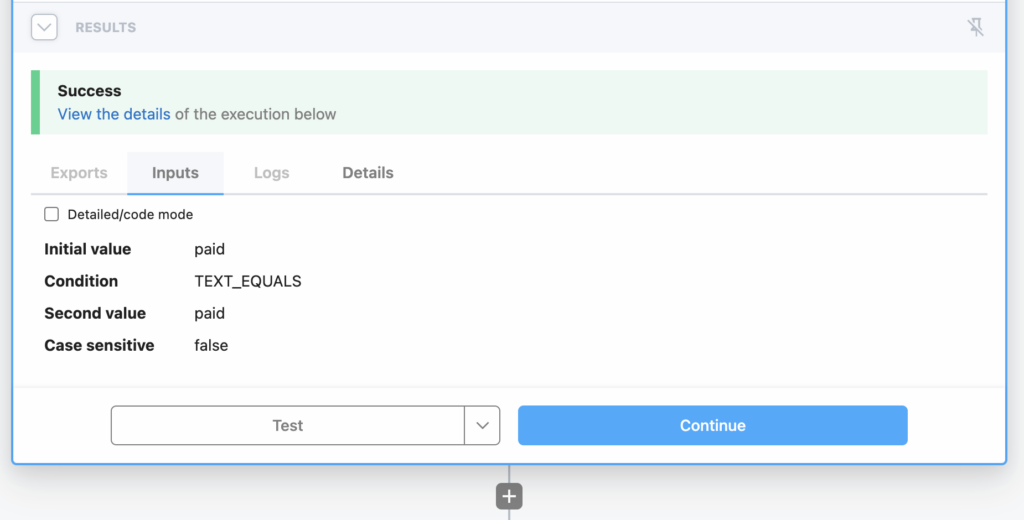
Then, click the Test button.
You should get a Success message. Then, click the small plus (+) button.
6. Set up Pipedream’s Send Email
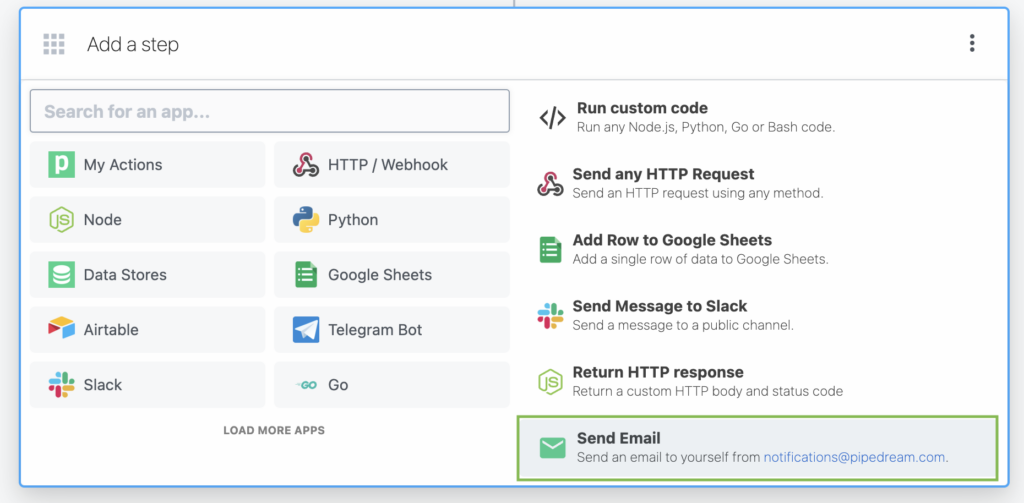
Select Send Email.
Then, set your preferred email Subject & Text.
Example,
Subject: Payment received. ID: {{steps.code.$return_value.id}}. Total RM {{steps.code.$return_value.payment.amount / 100}}

Text: Hi.

This is to inform that a payment have been received.

Client Full Name: {{steps.code.$return_value.client.full_name}}
Client Email: {{steps.code.$return_value.client.email}}
Product name: {{steps.code.$return_value.purchase.products[0].name}}
Payment amount: RM {{steps.code.$return_value.payment.amount / 100}}
Reference: {{steps.code.$return_value.reference}}
Reference Generated: {{steps.code.$return_value.reference_generated}}

Purchase Link: {{steps.code.$return_value.checkout_url}}
Invoice Link: {{steps.code.$return_value.checkout_url}}/invoice/
Test Payment: {{steps.code.$return_value.is_test}}
Platform: {{steps.code.$return_value.platform}}
Notes: {{steps.code.$return_value.purchase.notes}} 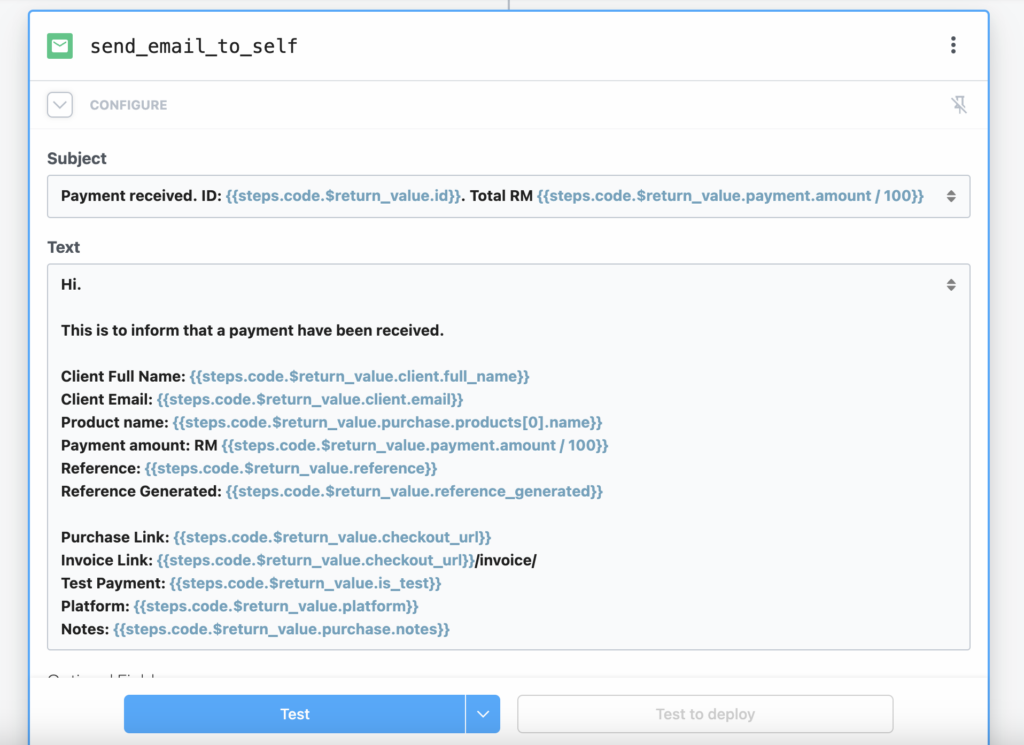
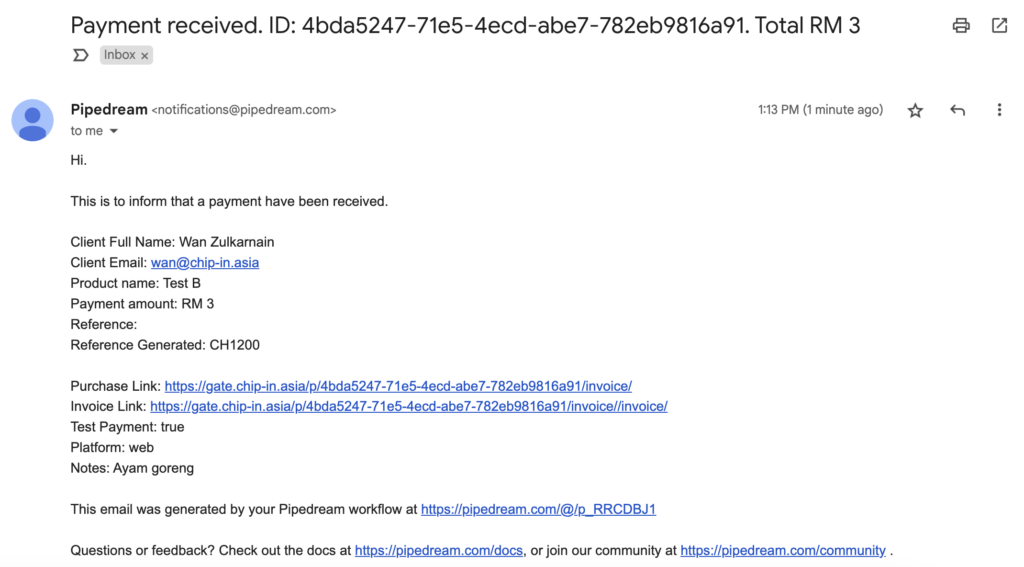
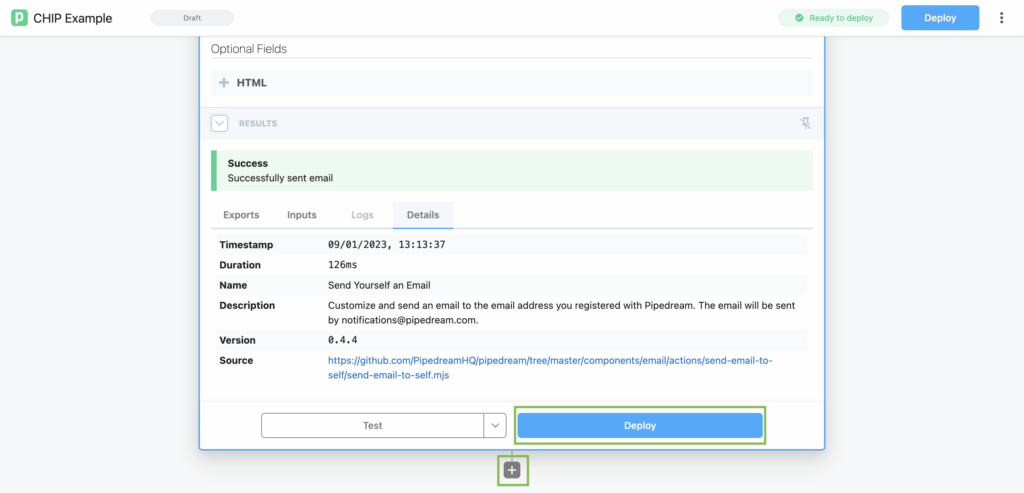
You should get a Success message and the test email.

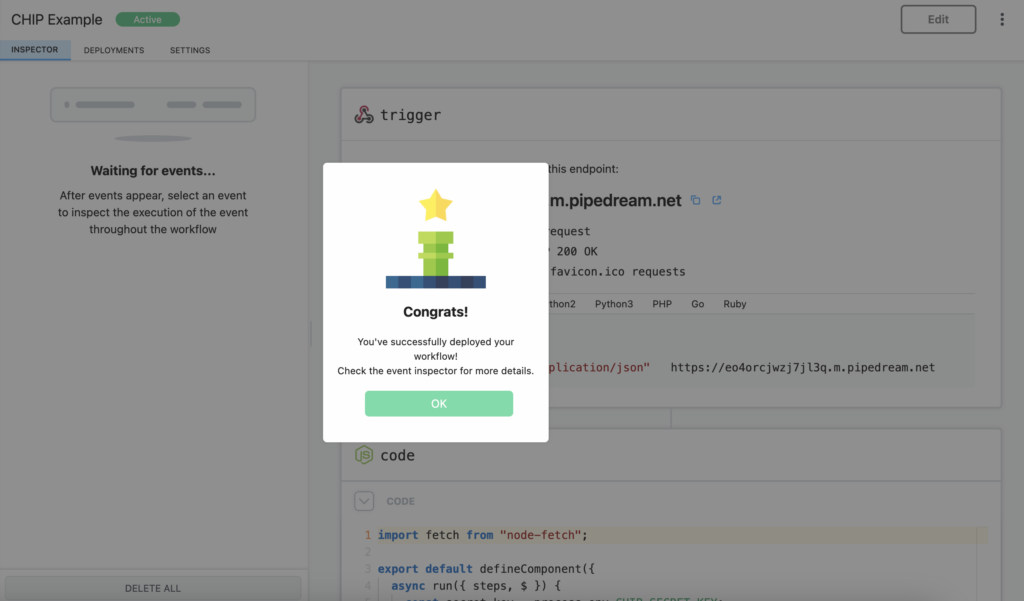
You can now deploy the workflow.
Optional step: set up Pipedream’s Send SMS using Adasms
Add a step by selecting Send any HTTP Request.
Next, set the step as the following:
- Name =
custom_request - HTTP Request Configuration =
POST (value: https://terminal.adasms.com/api/v1/send) - Token =
{{process.env.ADASMS_TOKEN}} - Phone =
your mobile no. - Message =
Hi. Payment received. ID: {{steps.code.$return_value.id}} with amount RM {{steps.code.$return_value.payment.amount / 100}}
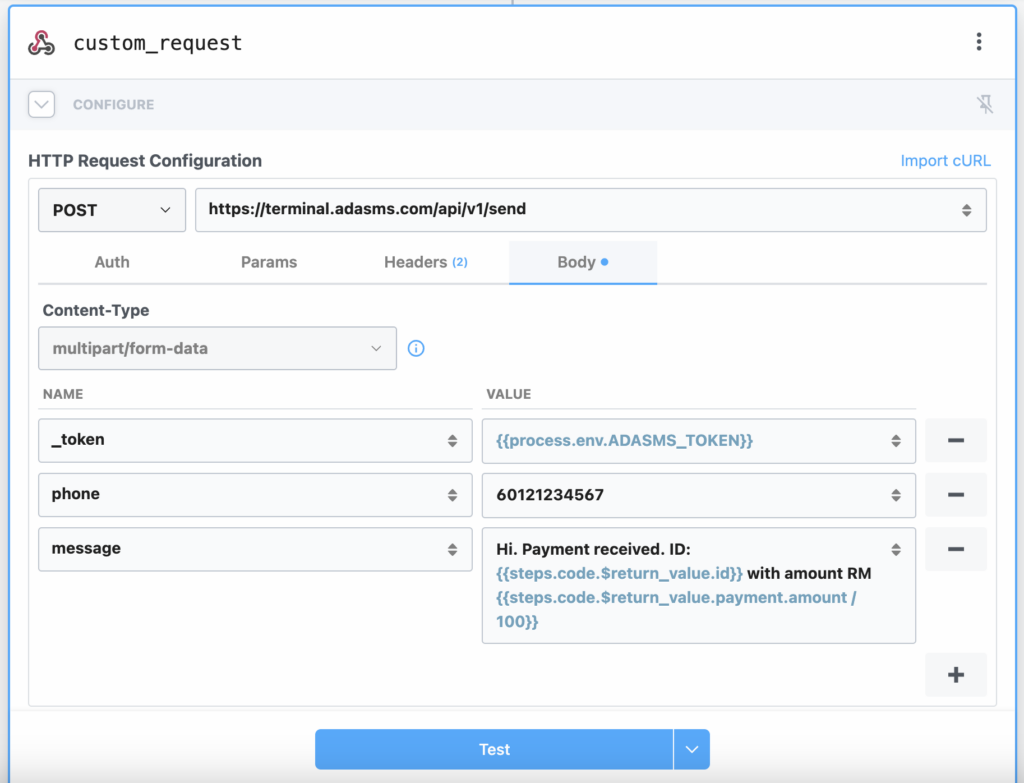
Then, click the Test button. You can deploy once you are satisfied.
Key takeaways
- Webhooks are messages sent from one server to another when there is a trigger.
- CHIP provides 21 webhook events.
- There are countless 3rd-party webhook gateways in the market, including but not limited to Pipedream, Zapier, Pabbly, and Make (Integromat).
Conclusion
This article showcases one of the use cases you can apply using the CHIP Webhooks.
The possibility is endless. A well-planned workflow will enable you to achieve automation wonders.
Let us know if you are thinking about any other use case in our Facebook community group so that we can consider sharing it in our next article.
We’re always open to content contributions from our community. Join our Facebook Group and share your work or topic ideas to potentially be featured on our blog.
Moreover, if you have suggestions for our upcoming features, we’d love to hear them! Share your Wishlist with us.
Don’t forget to like and follow us on our social media platforms if you haven’t yet. You can find us on Facebook, Twitter, Instagram, and LinkedIn. We appreciate your support! 🙂