WordPress is a robust platform for blogging.
By integrating the WooCommerce plugin, you can easily turn your WordPress blog into an online store.
For those wishing to use CHIP as their payment method, it’s essential to install the CHIP for WooCommerce plugin.
In this guide, we’ll outline the process of setting up CHIP for WooCommerce, allowing you to seamlessly accept payments in your online store.
Necessary Prerequisites
Before delving into the installation and setup of the plugin, it’s crucial to confirm that your WordPress setup meets specific criteria:
Before delving into the installation and setup of the plugin, it’s crucial to confirm that your WordPress setup meets specific criteria:
- A self-hosted WordPress installation (with a version 4.7 or higher)
- WooCommerce installed (version 3.3.4 or above)
Once these prerequisites are in place, we’re ready to proceed with the subsequent steps.
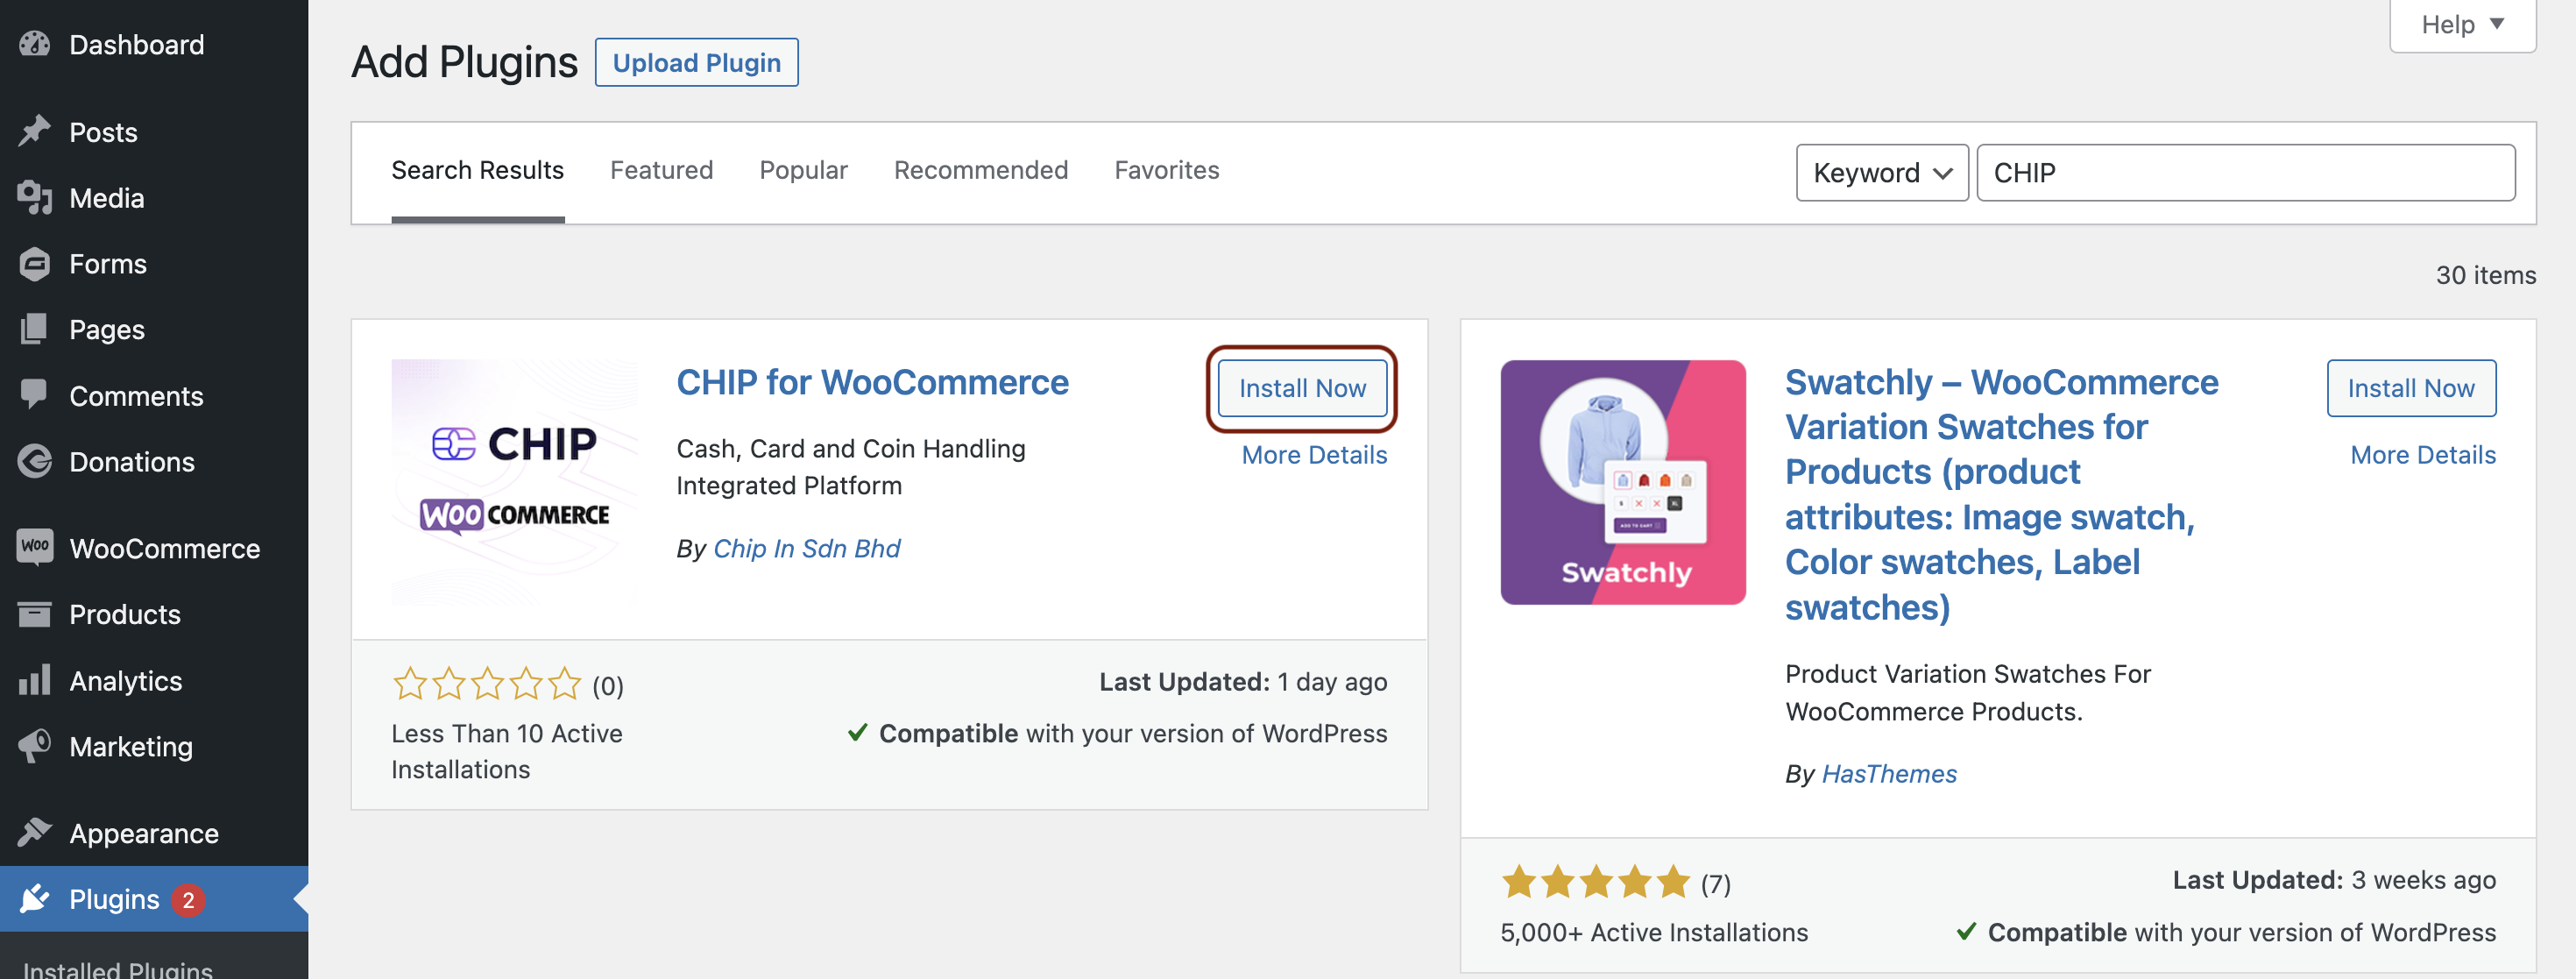
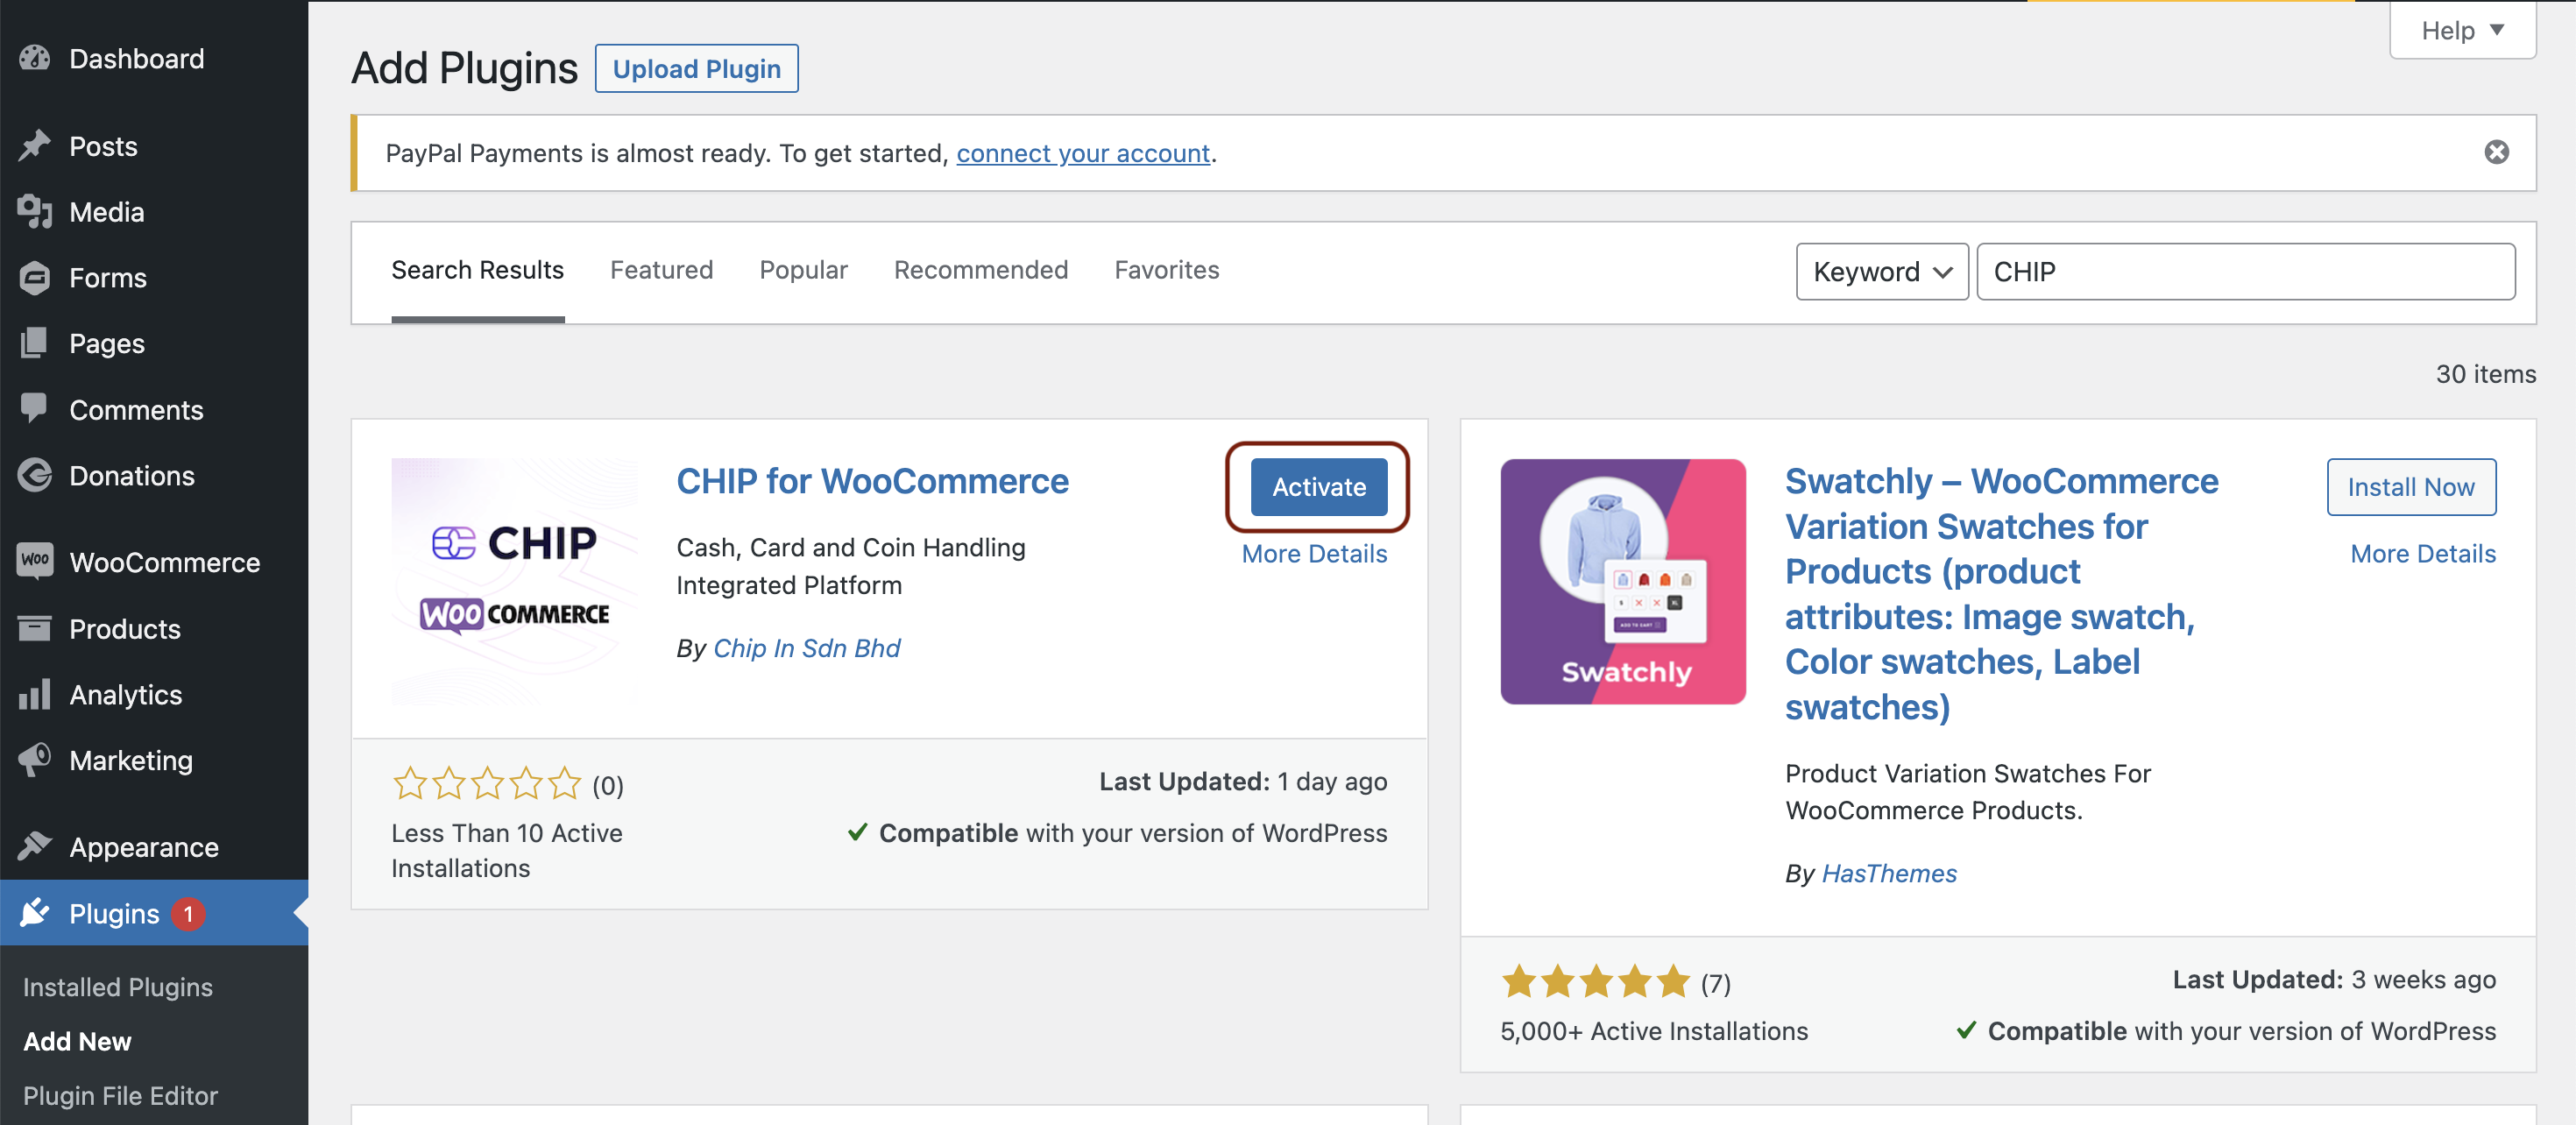
1. Installation Process
Firstly, navigate to your WordPress Dashboard. From there, select Plugins >> Add New. In the search bar, enter “CHIP for WooCommerce.” Once located, install and subsequently activate the plugin.
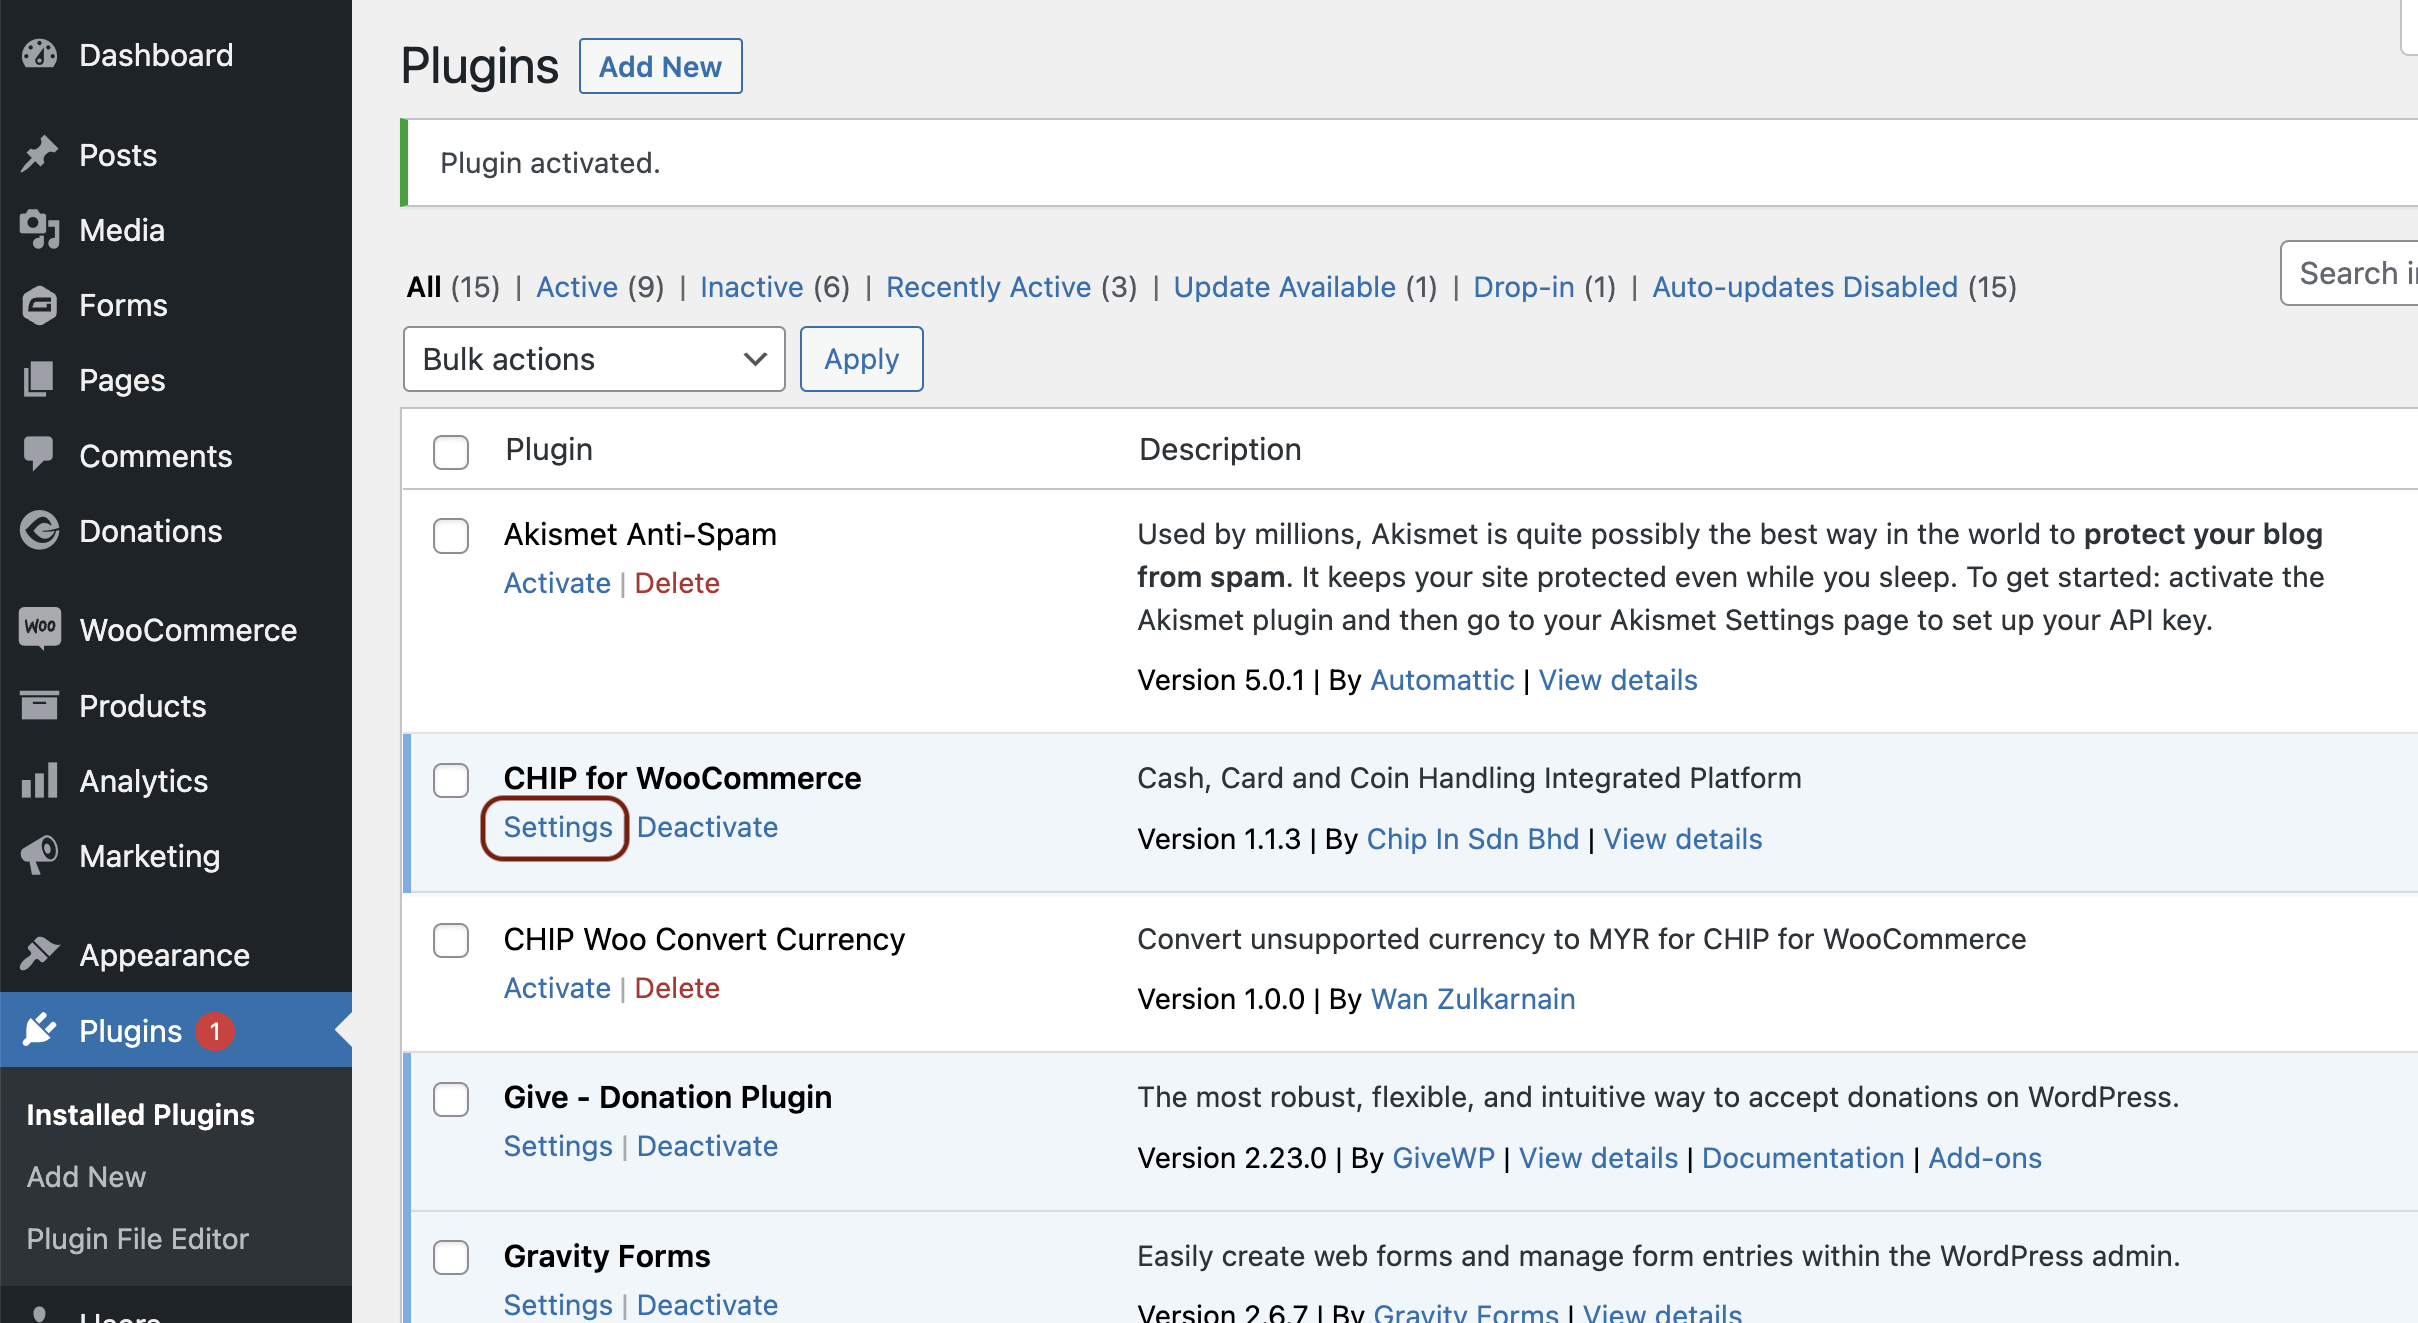
2. Configuration Process
Next, navigate to the plugin’s Settings configuration.
By default, CHIP offers four payment methods: CHIP Corporate Online Banking, CHIP Card, CHIP Online Banking, and CHIP E-Wallet.
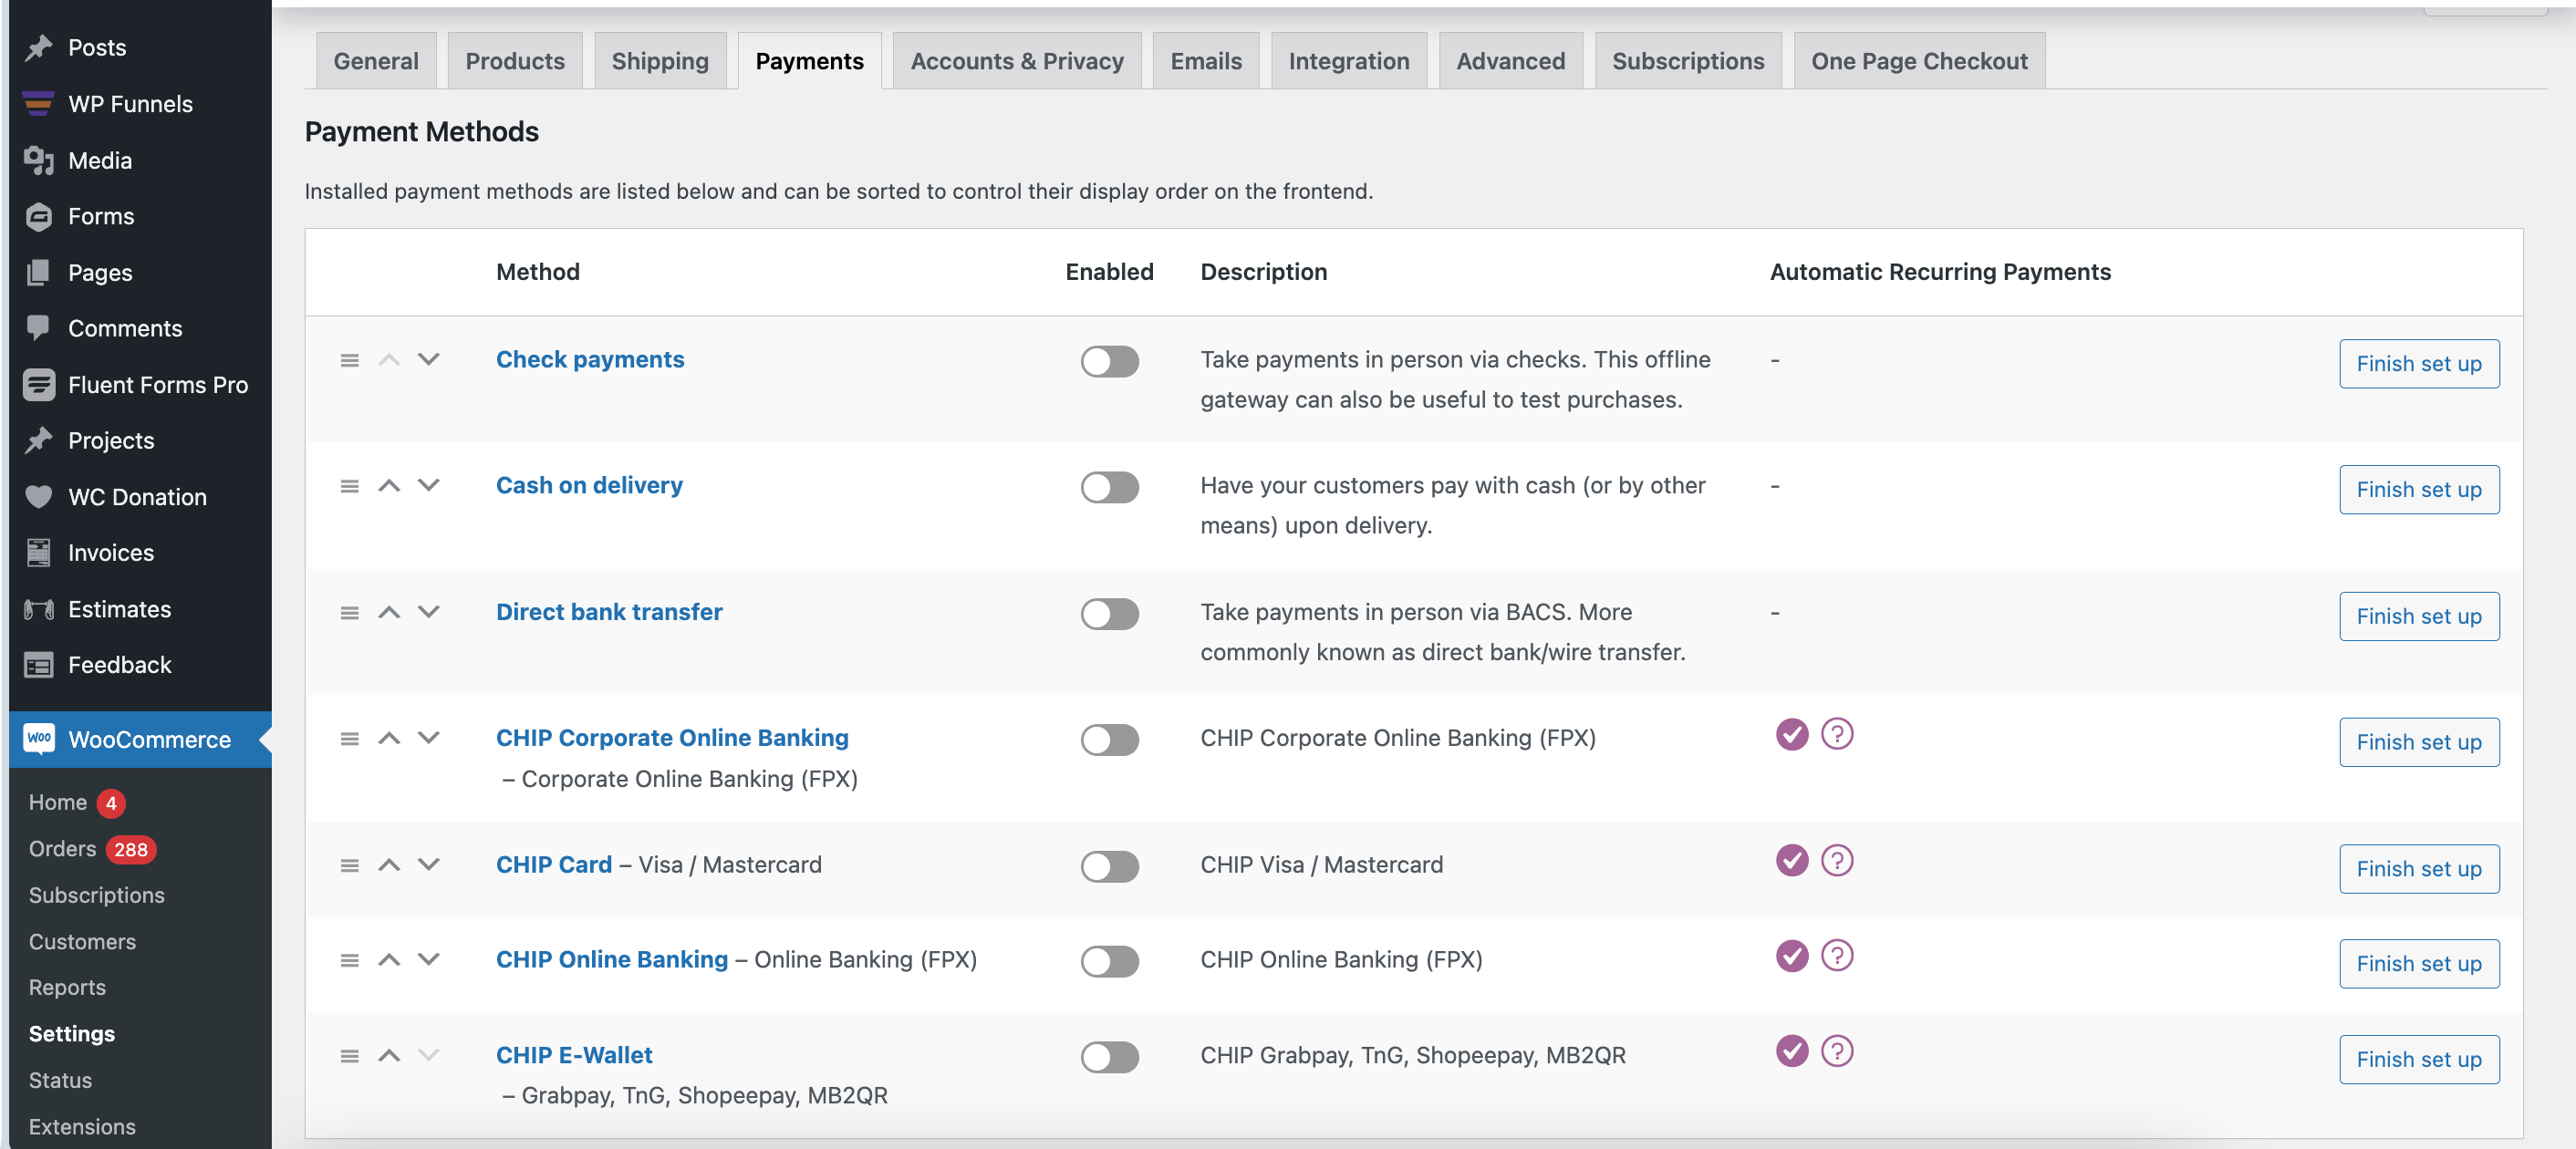
We’ll focus on setting up CHIP Online Banking:
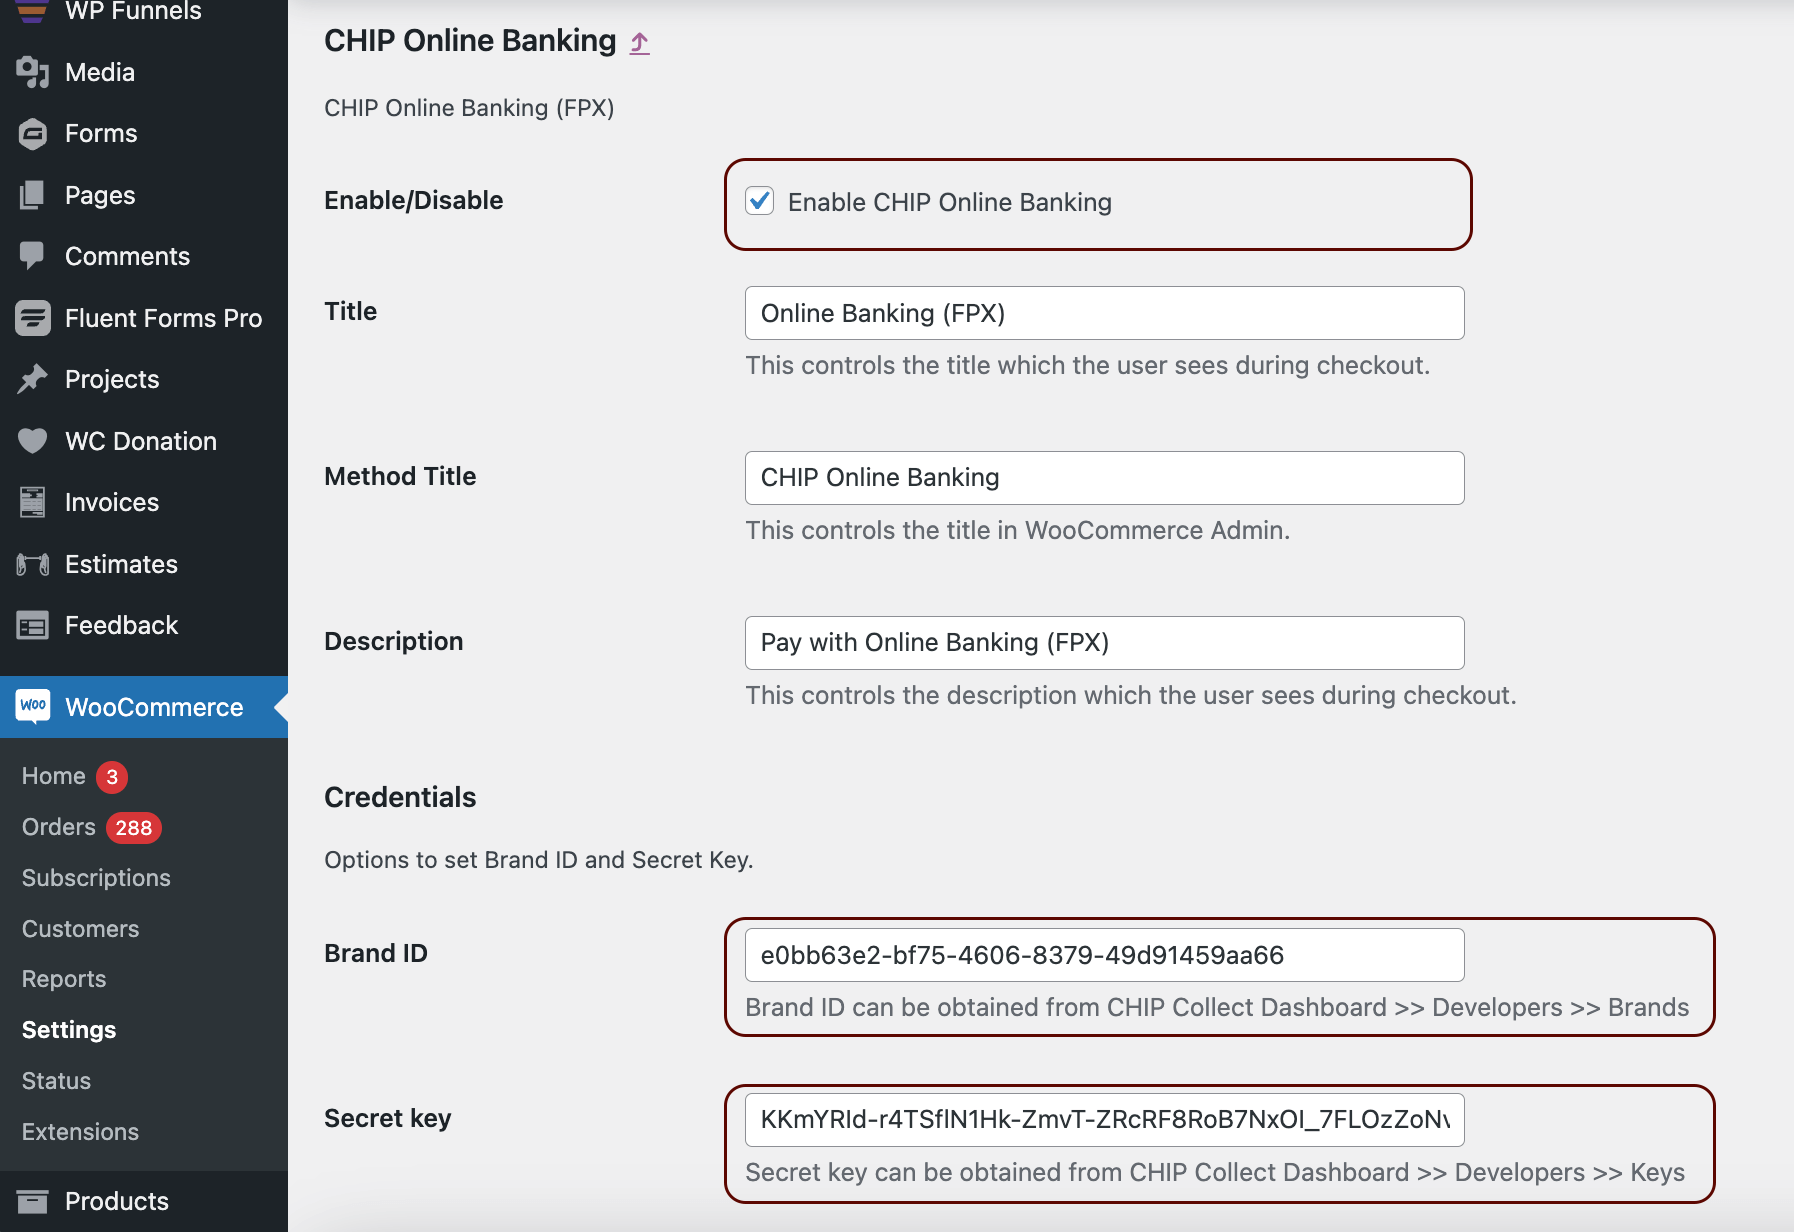
First enter your CHIP account’s Brand ID and Private Key. Remember, you can obtain these details from your CHIP Merchant Portal.
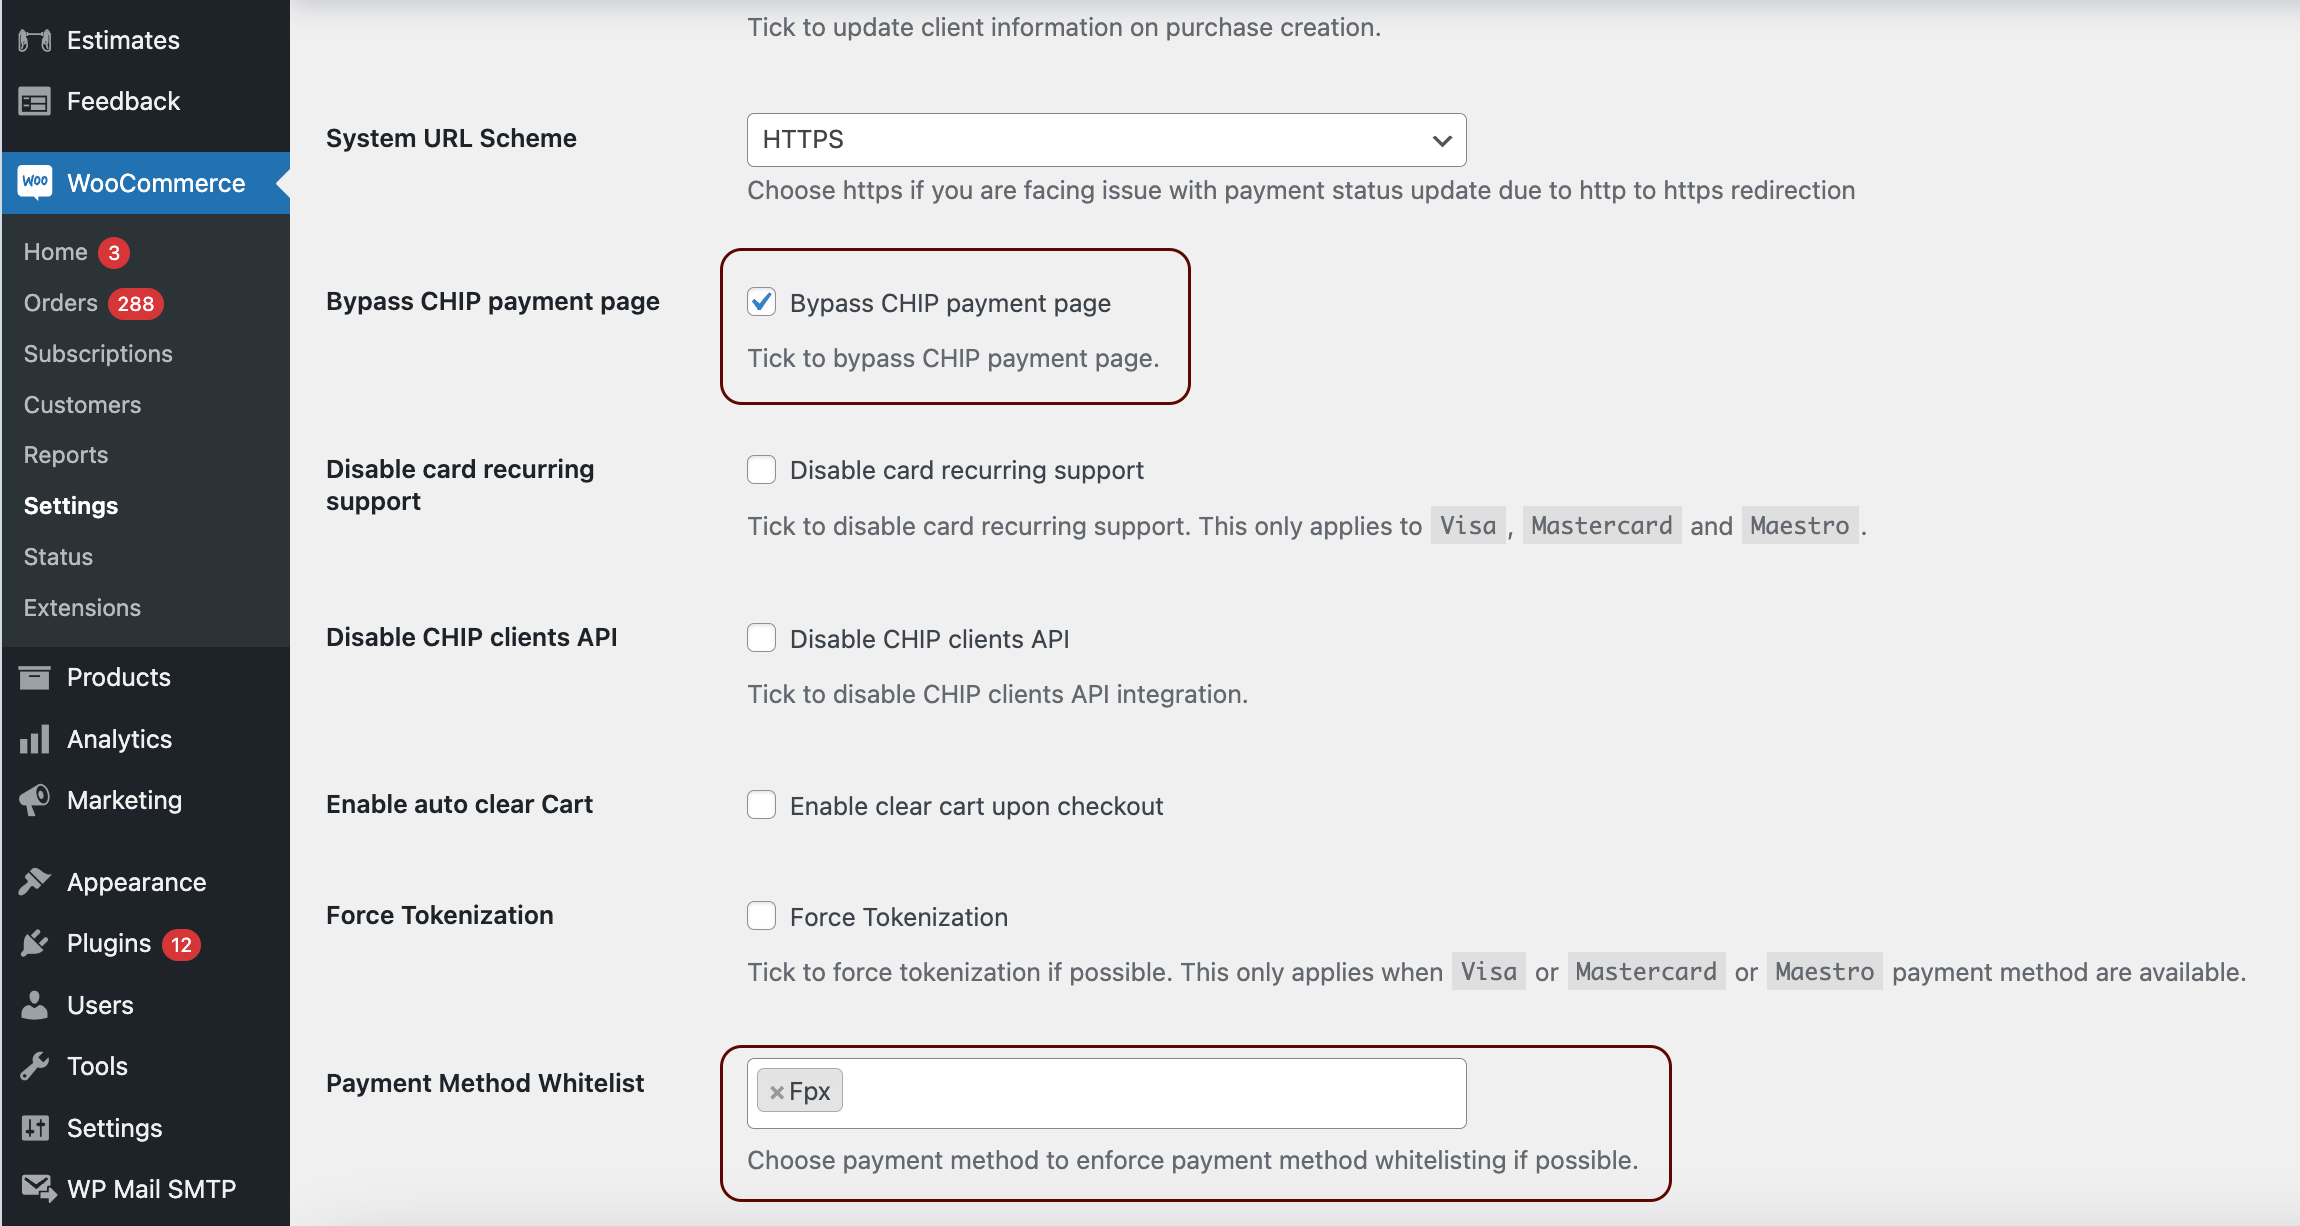
Next, make sure the “Enable CHIP Online Banking” option is checked. Additionally, ensure the “Bypass CHIP payment page” option is selected and set the Payment Method Whitelist to “Fpx“.
It’s worth noting that selecting the “Bypass CHIP payment page” activates the CHIP Direct Post feature. For the specific values required, you can refer to Table 1.
| Type | Value |
|---|---|
| CHIP Online Banking | Fpx |
| CHIP Corporate Online Banking | Fpx B2b1 |
| CHIP Card | Visa, Mastercard, Maestro |
| CHIP E-Wallet | Razer, Razer Atome, Razer Grabpay, Razer Shopeepay, Razer Tng |
With these steps completed, you’ve successfully configured the CHIP for WooCommerce plugin. Your WooCommerce store is now primed to handle payments.
3. Test the integration
It’s strongly recommended to test both the purchase and payment processes to ensure a smooth user experience.
Note: The demonstration flow described here pertains to the purchase of a basic, virtual, and downloadable item.
Initiate the process by selecting a product and then pressing the “Add to Cart” button.
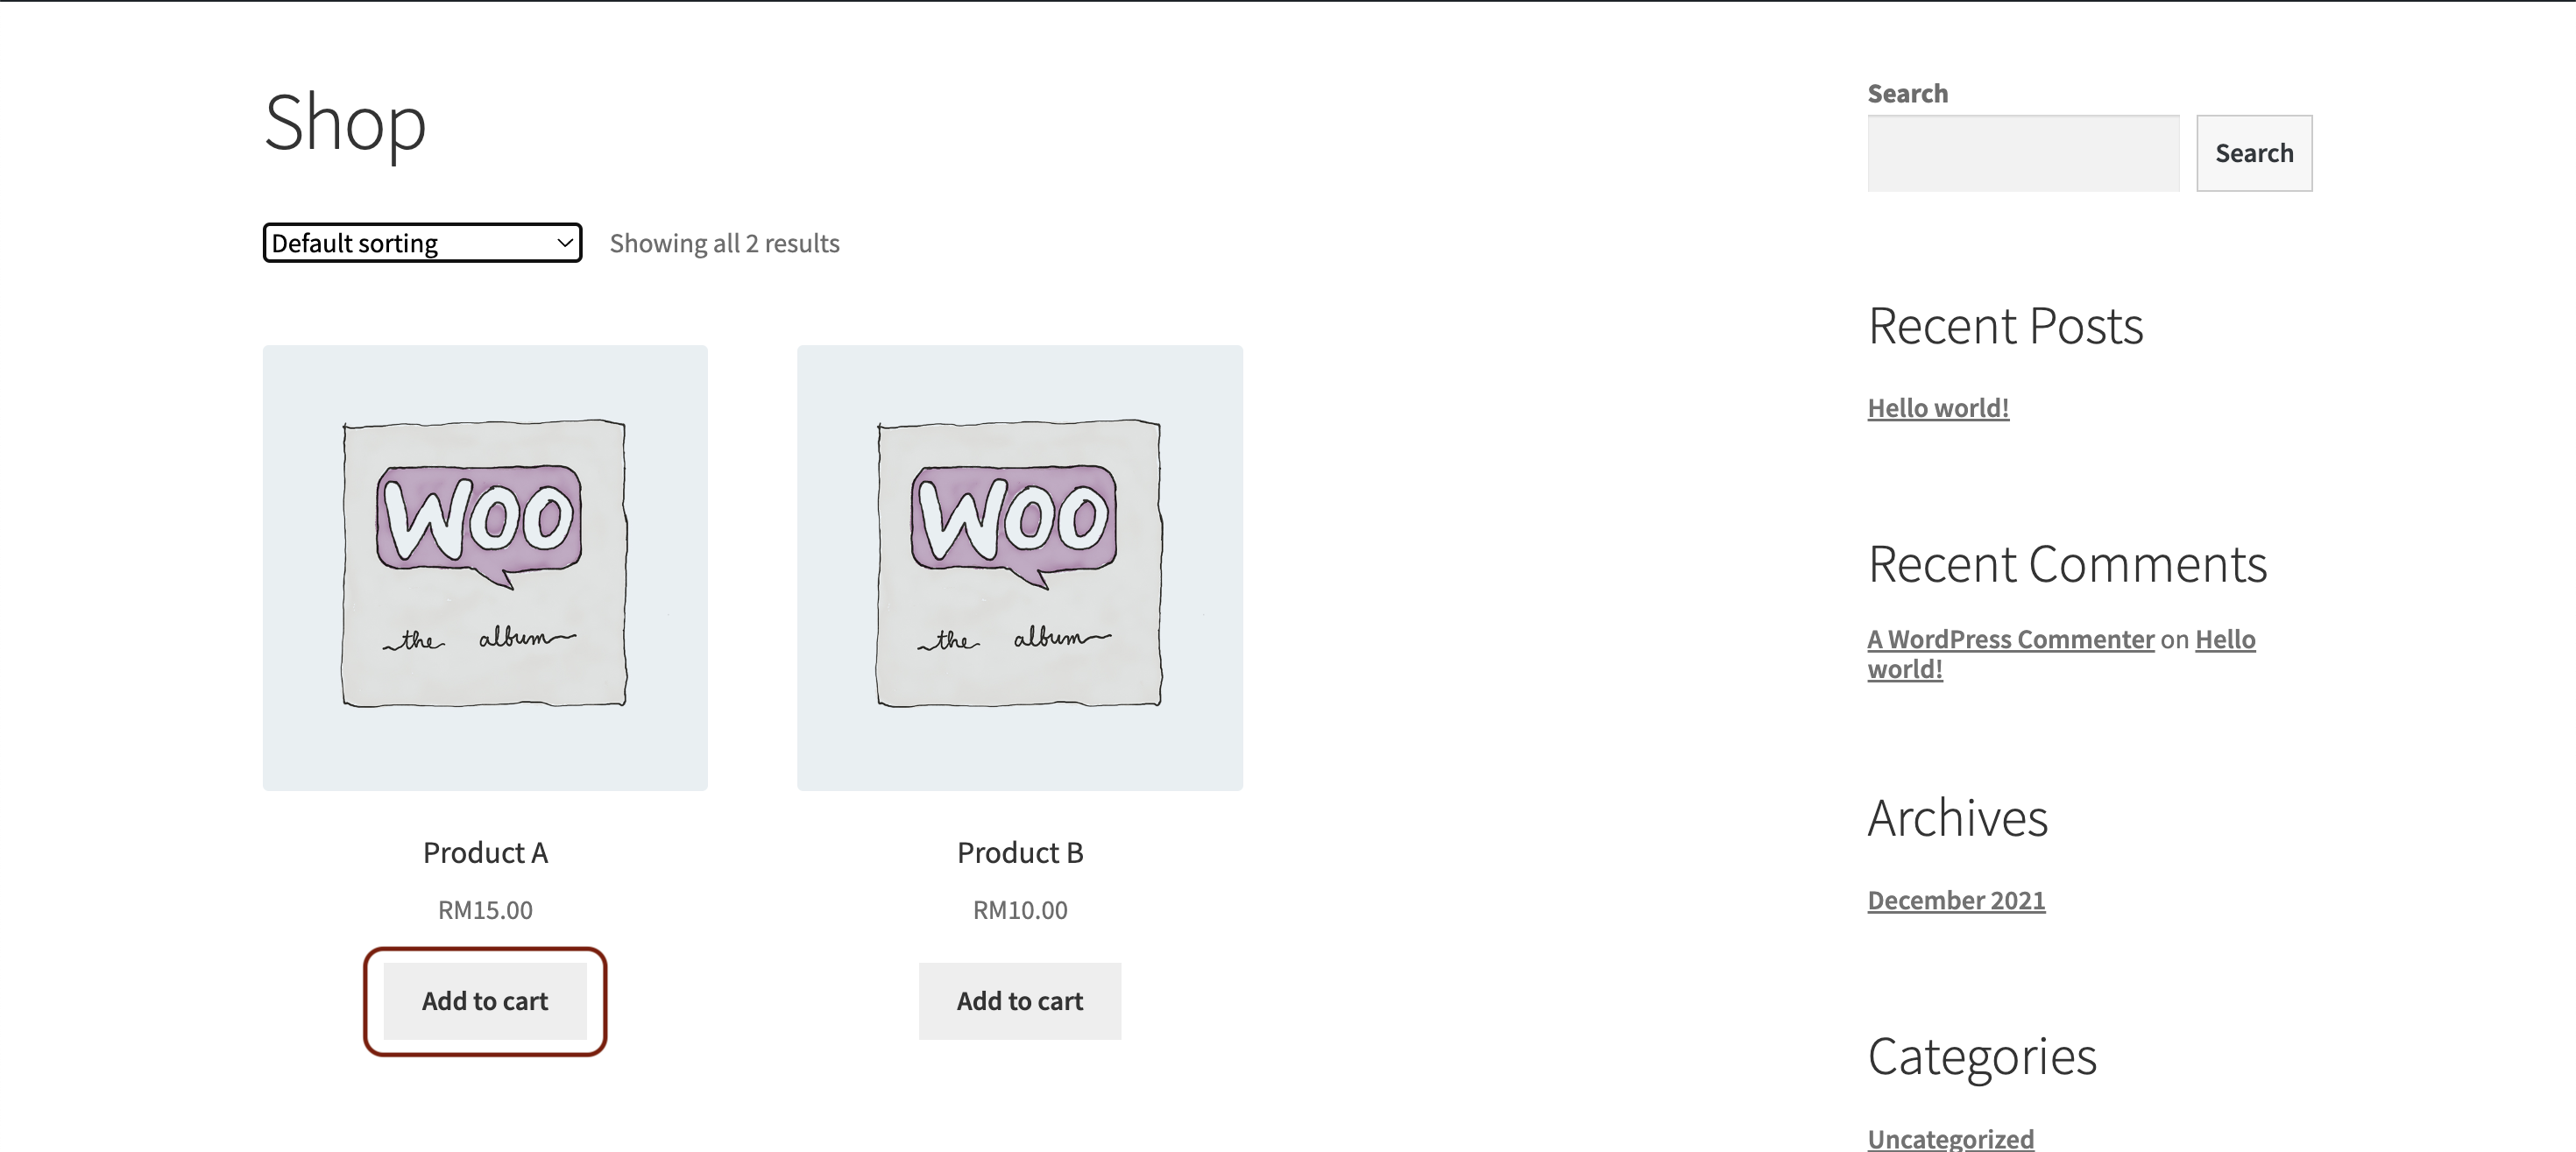
Next, review the items in the cart and proceed to checkout. At this stage, buyers will be prompted to complete the checkout form and select their preferred online banking option.
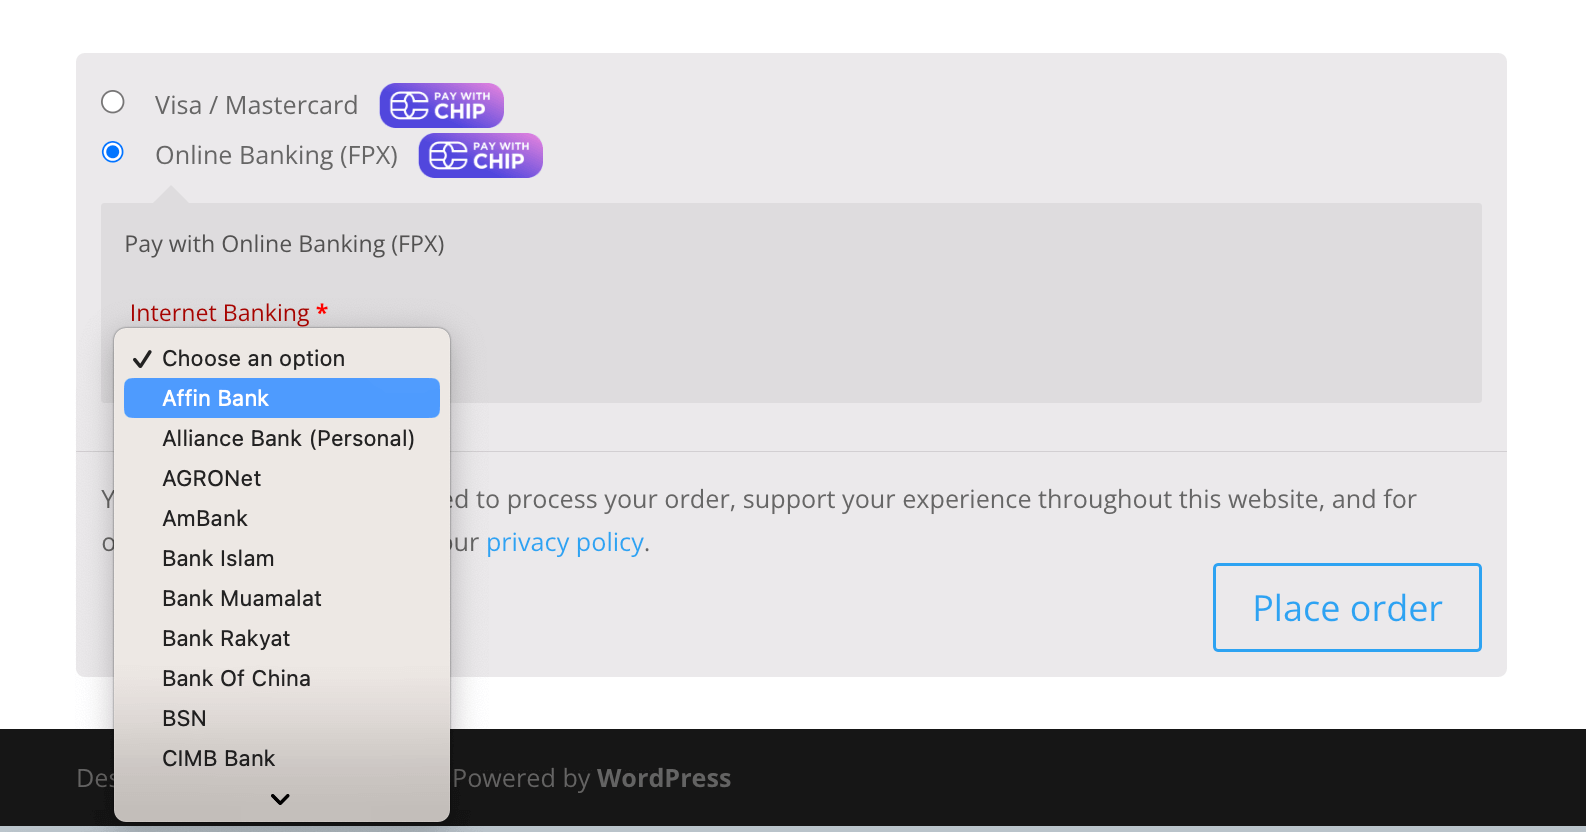
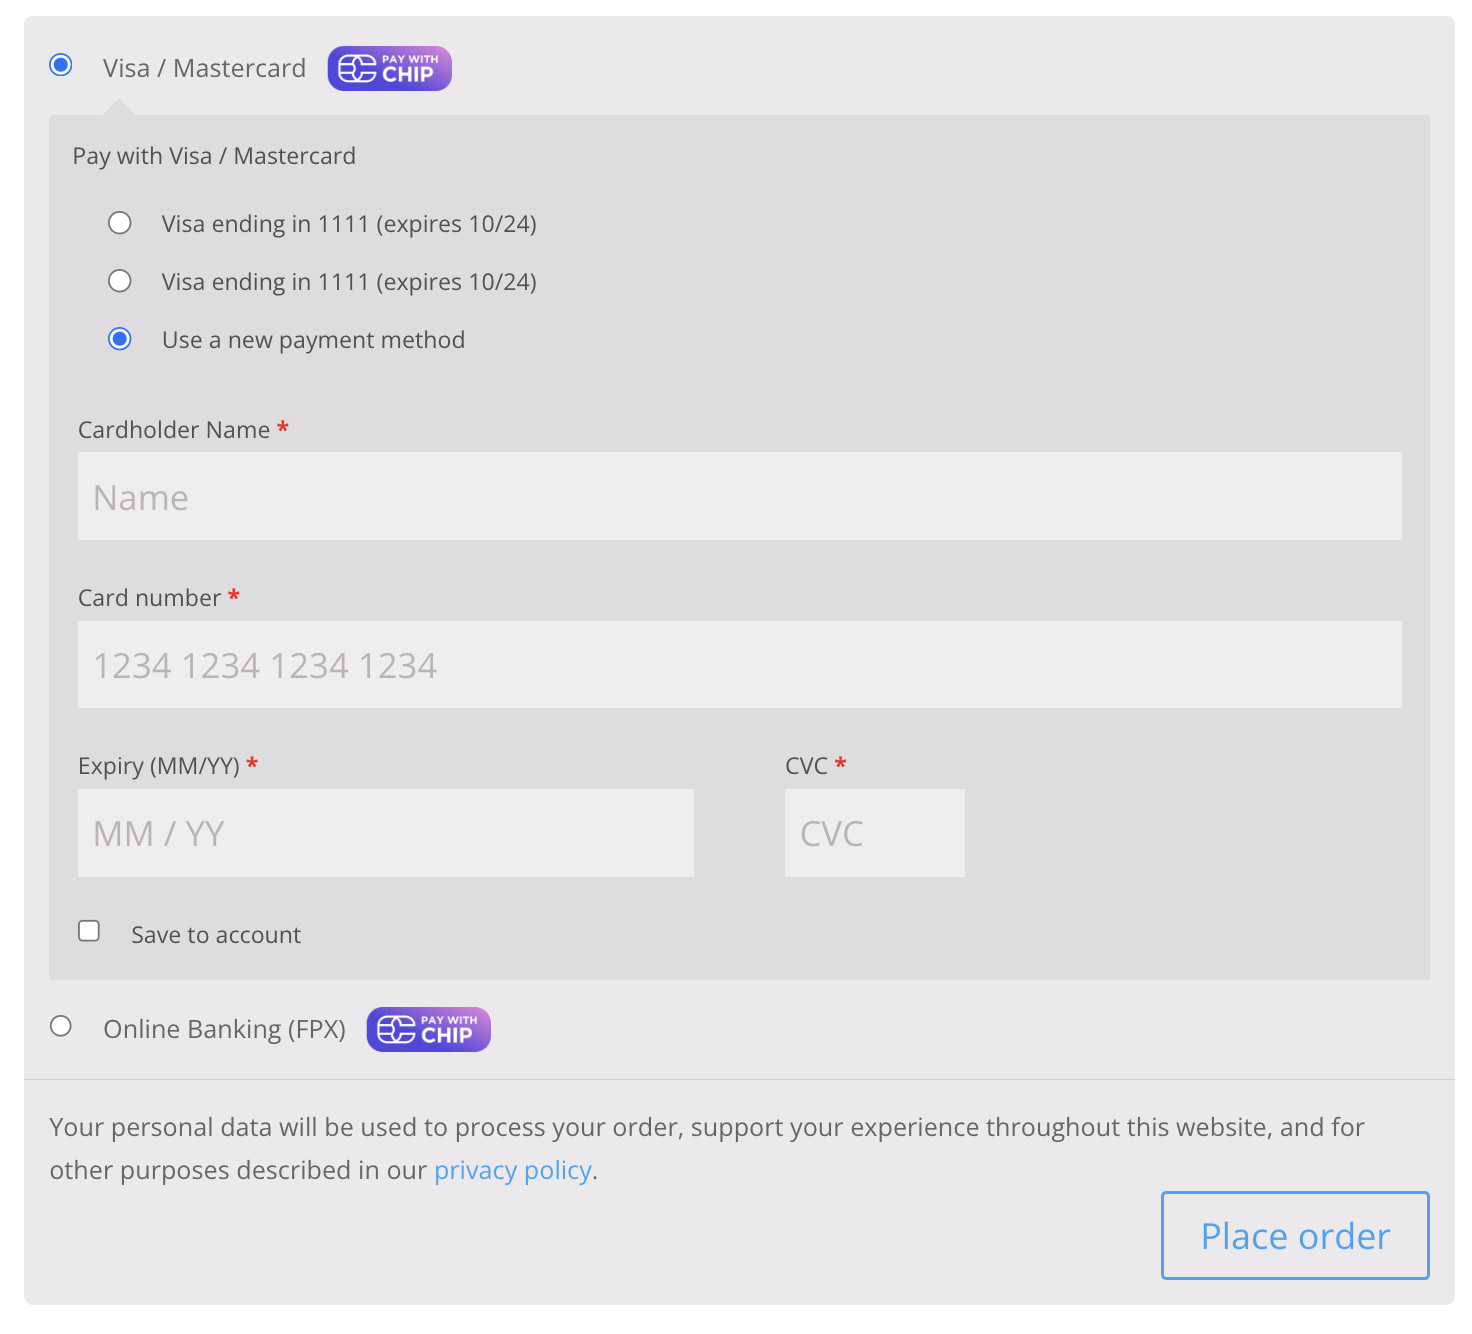
Alternatively, they might opt to pay using Visa or Mastercard.
In a real scenario, choosing a bank payment method would typically redirect the user to the respective bank’s online banking page. However, because we are in a test environment, users will see options to approve or decline the payment, rather than being taken to an actual bank interface.
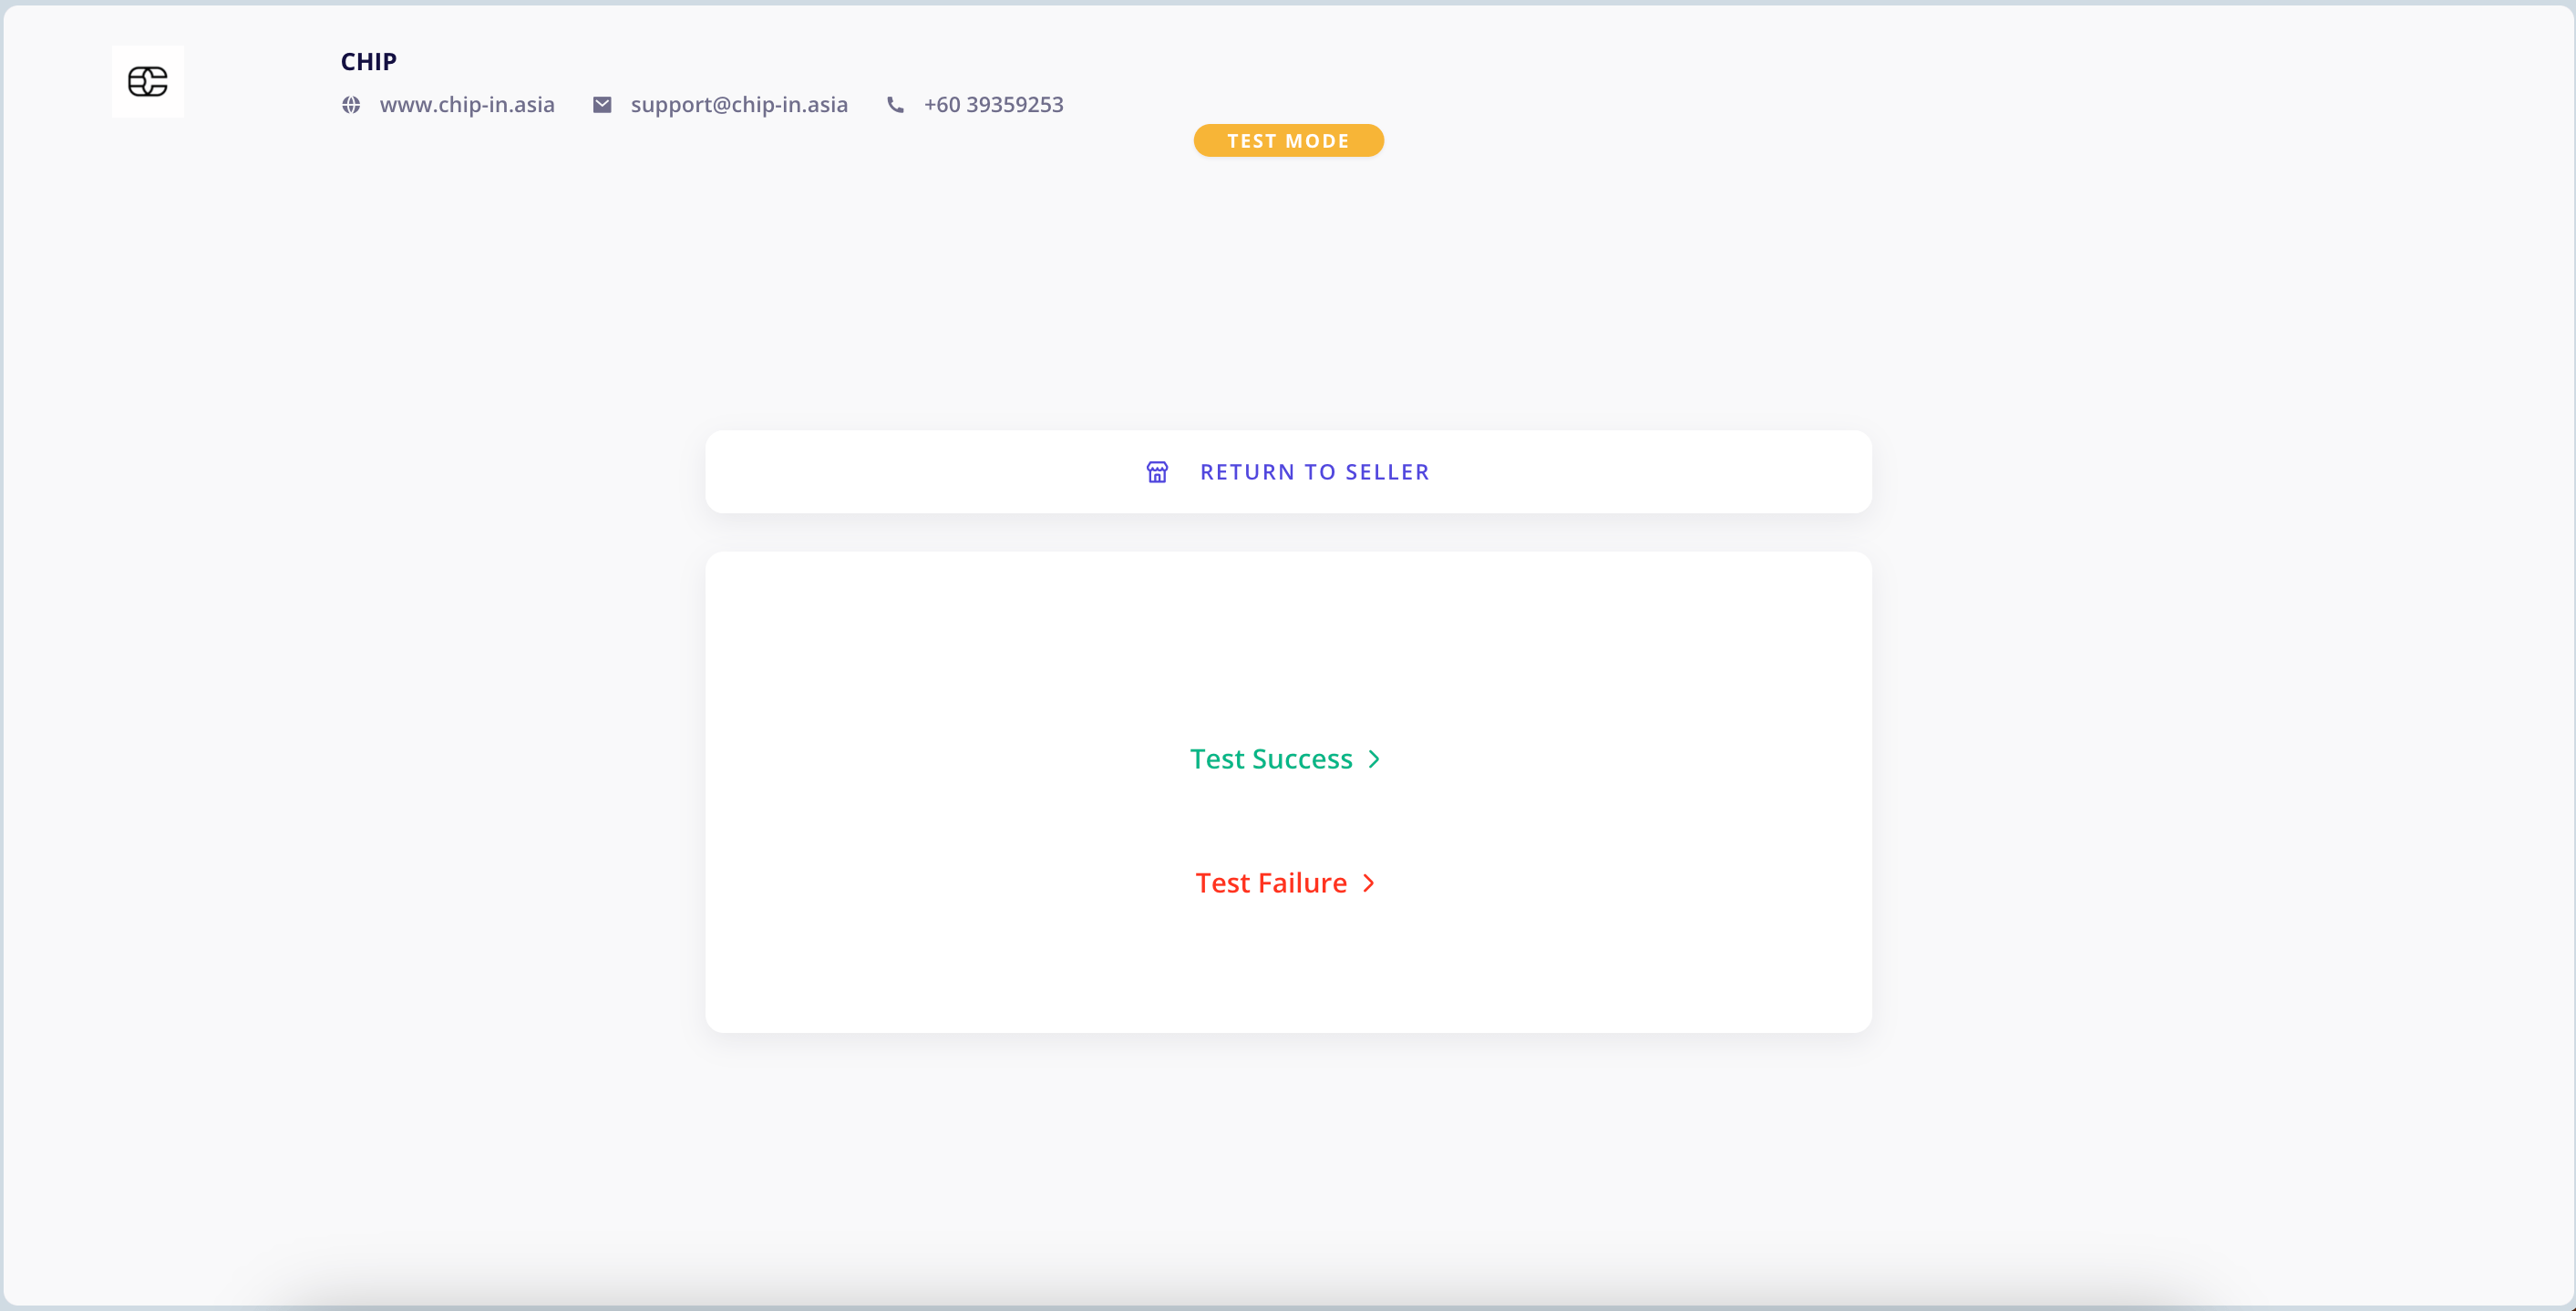
Once the transaction is successful, CHIP will automatically redirect users back to the WooCommerce site.

You can find the plugin on the WordPress Plugin Repository, where you can download and view the version history. Alternatively, you can also find the download link on our API page.
Be sure to test it, and don’t forget to leave a 5-star rating on our plugins!
Recommended related topic
Read: CHIP Collect – CHIP for WooCommerce: initiate refund to customer
We’re always open to content contributions from our community. Join our Facebook Group and share your work or topic ideas to potentially be featured on our blog.
Moreover, if you have suggestions for our upcoming features, we’d love to hear them! Share your Wishlist with us.
Don’t forget to like and follow us on our social media platforms if you haven’t yet. You can find us on Facebook, Twitter, Instagram, and LinkedIn. We appreciate your support! 🙂