There are multiple ways to integrate CHIP for payment collection.
Besides our plugins and API for website integration, we also provide CHIP Mobile SDK for iOS or Android app integration.
Introduction to the CHIP iOS Mobile SDK
Our iOS Mobile SDK helps you integrate CHIP payment into your iOS application.
It redirects the application to the payment page. It requires a response from POST /purchases/ and GET /payment_methods/.
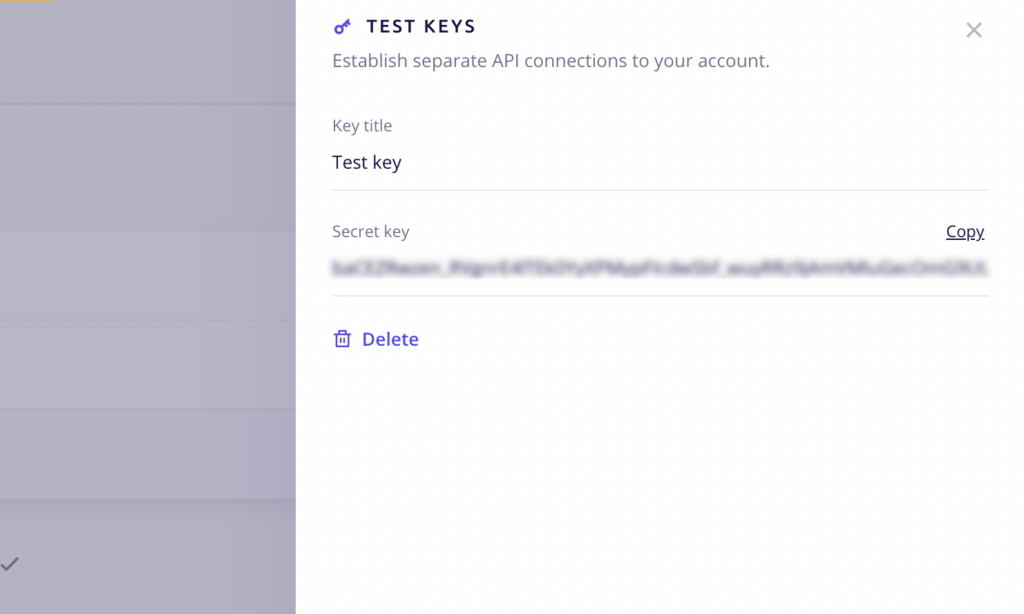
1. Set up your developer environment
Login to the CHIP Merchant Portal, navigate to Developer > Keys, and create a new key. Copy the “Secret key” for calling the POST /purchases/ and GET /payment_methods/.
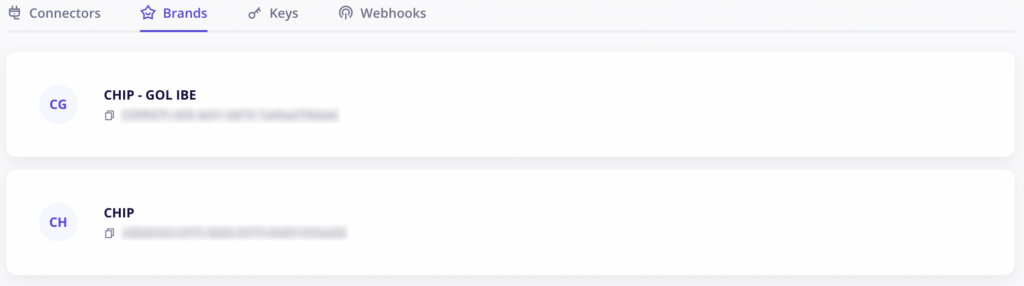
Then, navigate to Developer > Brands and retrieve your Brand ID.
2. Download the CHIP iOS Mobile SDK
Download our SDK from here and copy the framework to your XCode project.
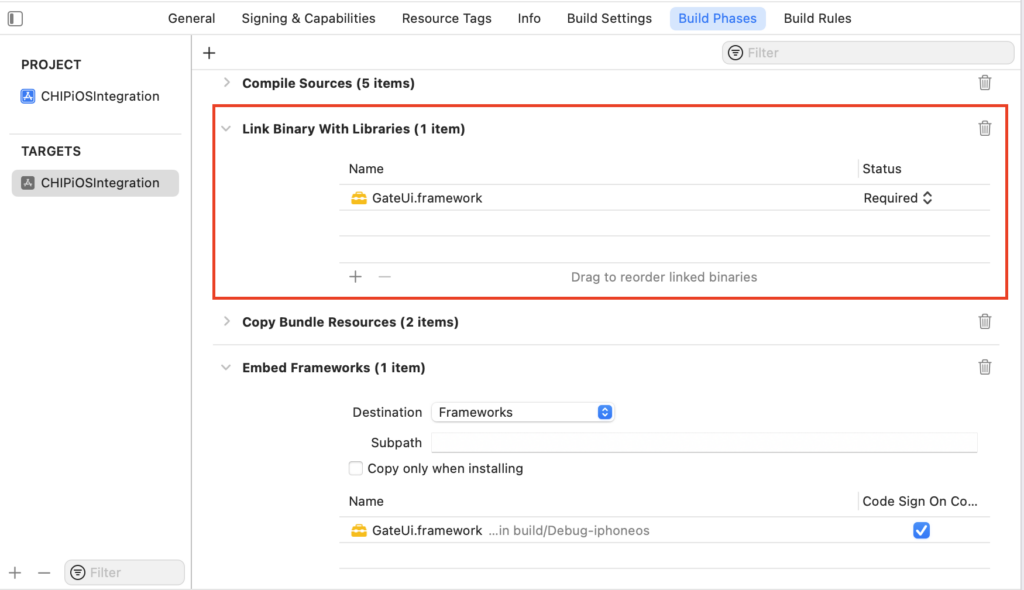
Open your project’s settings by selecting your Targets under the General tab, and navigate to Frameworks, Libraries, and Embedded Content. Make sure the framework is listed and set to Embed & Sign.
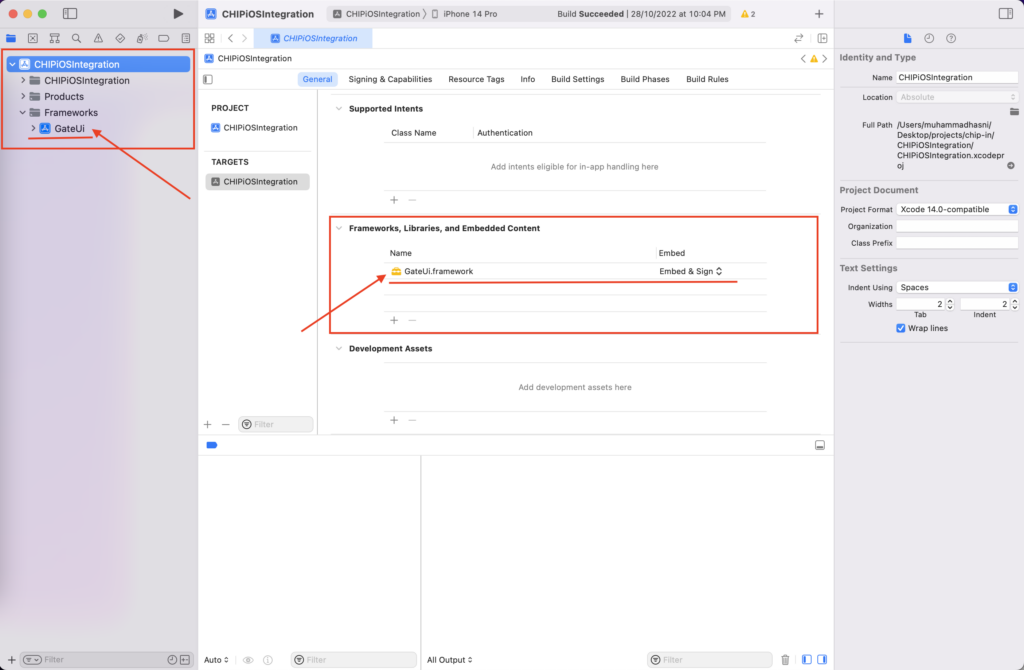
Navigate to Build Phases under Link Binary With Libraries, and make sure the framework is listed here too.
3. Get payment methods and create purchase
Create functions to get payment methods and create a purchase. The data will be passed to the mobile SDK to make it works.
4. Integrate our iOS Mobile SDK
Sample code integration with SDK in Swift 5.0:
import GateUi
import UIKit

struct GatePurchaseResponse: Codable {
  let id: String?
  let purchase: GatePurchase?
  let checkout_url: String?
  let direct_post_url: String?
  let success_redirect: String?
  let failure_redirect: String?
}

class Payment: UIViewController, GateSdkViewControllerDelegate {
  func createPayment(
    purchase: GatePurchaseResponse, // response from POST /purchases/
    paymentMethods: GateCurrencyResponse // response from GET /payment_methods/
  ) {
    // Enter your company name to display in Payment process
    GateUi.config.merchant = "CHIP Demo Merchant"

    // make sure you pass this on POST /purchases/ payload
    GateUi.config.successUrl = purchase.success_redirect!

    // make sure you pass this on POST /purchases/ payload
    GateUi.config.failUrl = purchase.failure_redirect!

    let vc = GateUi.setup(
      purchase.checkout_url!,
      postUrl: purchase.direct_post_url,
      methods: paymentMethods,
      amount: purchase.purchase?.total,
      currency: purchase.purchase?.currency
    )

    // class have to conform to GateSdkViewControllerDelegate protocol
    GateUi.paymentDelegate = self
    vc.modalPresentationStyle = UIModalPresentationStyle.fullScreen
    self.present(vc, animated: true, completion: nil)
  }

  func paymentCompleted() {
    print("Payment Completed")
  }

  func paymentFailed() {
    print("Payment Failed")
  }

  func paymentCanceled() {
    print("Payment Canceled")
  }
}
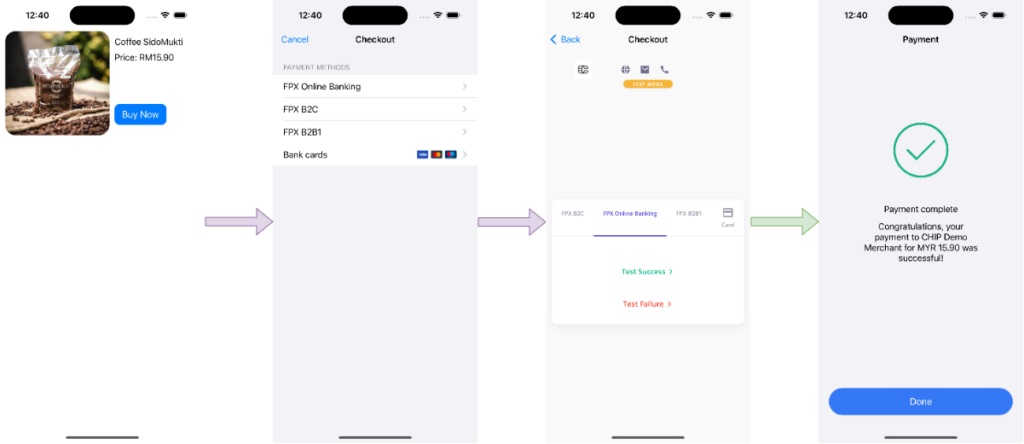
Successful payment example:
Note: Since this is a test environment, an option to approve or reject the payment appears instead of choosing an FPX bank or inserting card details.
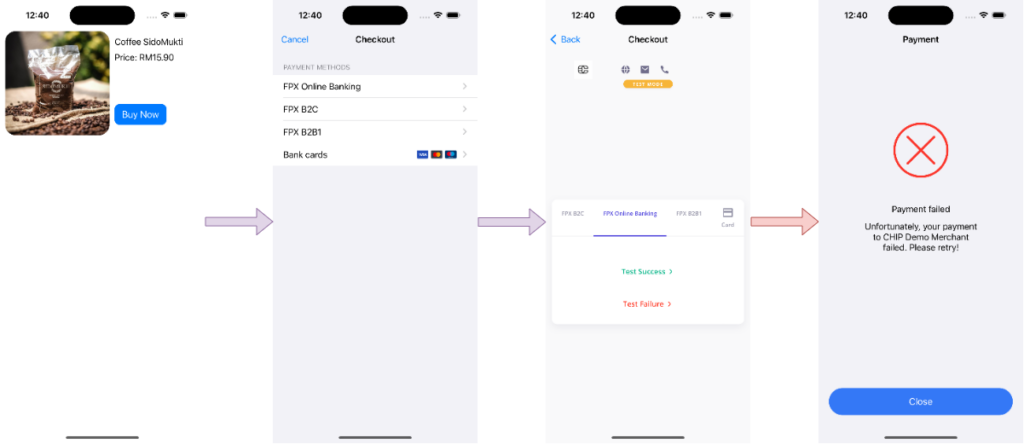
Failed payment example:
Note: Since this is a test environment, an option to approve or reject the payment appears instead of choosing an FPX bank or inserting card details.
All set! Now your app should be able to make a payment via CHIP. You can download our sample codes from GitHub.
We’re always open to content contributions from our community. Join our Facebook Group and share your work or topic ideas to potentially be featured on our blog.
Moreover, if you have suggestions for our upcoming features, we’d love to hear them! Share your Wishlist with us.
Don’t forget to like and follow us on our social media platforms if you haven’t yet. You can find us on Facebook, Twitter, Instagram, and LinkedIn. We appreciate your support! 🙂