At CHIP, we are continually dedicated to delivering the best customer payment experience.
Ensuring a smooth payment process is crucial, as it can significantly reduce cart abandonment and drive higher sales. That’s why we’re always on the lookout for ways to refine and enhance the user experience. Our recent advancement in this journey is the integration of the CHIP Collect API: Direct Post with our WooCommerce plugin.
For those looking to provide a seamless one-page checkout experience, it’s essential to install both the WooCommerce One Page Checkout and the latest version of CHIP for WooCommerce.
In this article, we’ll walk you through the steps to set up a one-page checkout for your WooCommerce products.
Necessary Prerequisites
Before diving into the plugin installation and configuration, ensure your WordPress setup meets the following prerequisites:
- A self-hosted WordPress site (version 4.7 or higher).
- WooCommerce installed (version 8.0 or higher).
- CHIP for WooCommerce (version 1.4.0 or higher).
Once these requirements are met, we’ll be ready to proceed with the next steps.
1. Installation and Configuration
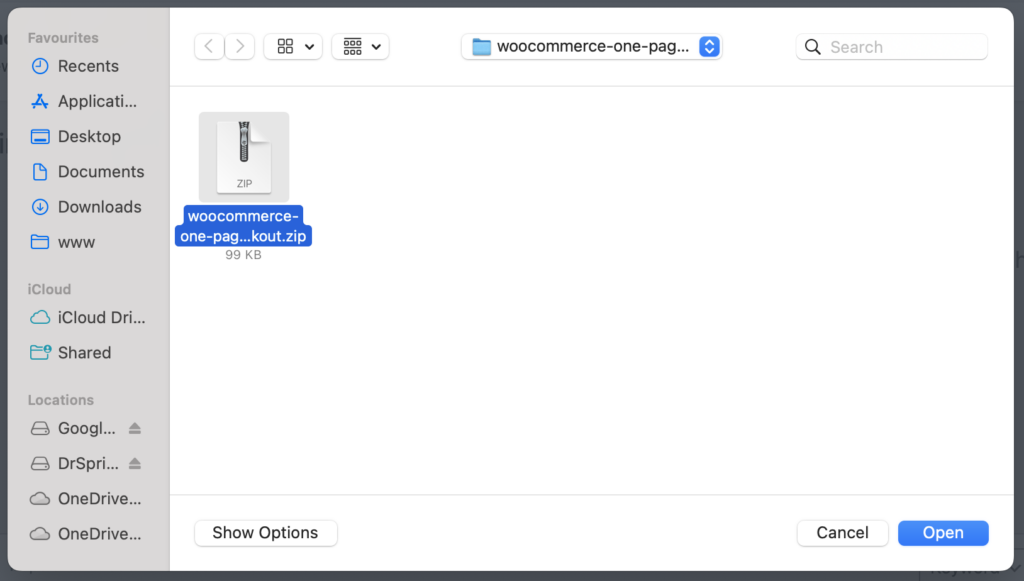
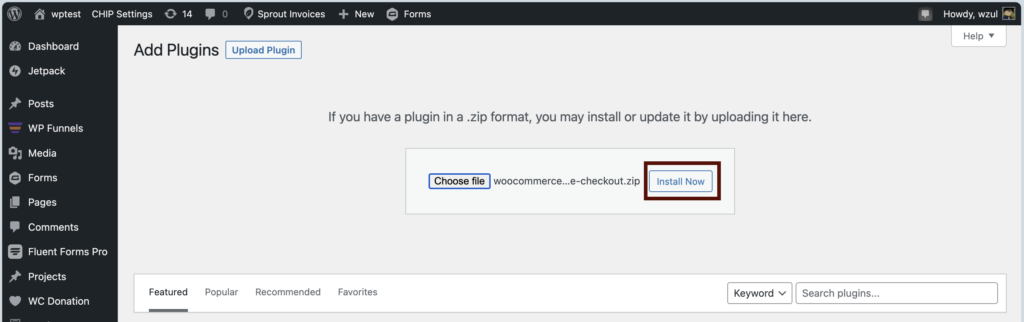
Firstly, log in to your WordPress Dashboard. From there, navigate to Plugins >> Add New >> Upload Plugin. Select the file named ‘woocommerce-one-page-checkout.zip’, install it, and then activate the plugin.
Please be aware that the WooCommerce One Page Checkout plugin is premium. To obtain it, you must purchase from WooCommerce’s official product page.
Note: However, we do have a sponsorship program. Drop an email to [email protected] to know more!
Next, proceed to Products >> Add New to introduce a new product to your store. Within the product settings, make sure to tick the option labeled “One Page Checkout.”

🎉 Congratulations! Your WooCommerce store is now configured to provide a seamless one-page checkout experience.
2. Experimenting with the Purchasing Experience
We strongly recommend simulating the purchasing and payment procedures to ensure a smooth user experience for your customers.
The process begins when a customer lands on the product page.

Next, they confirm the items in their cart and advance to the checkout phase. During this stage, the customer needs to fill out the Checkout form.
The website will subsequently redirect to the bank page or the 3DS challenge page. Since we are in a test environment, a test card will be utilized for payment, and this card is not subjected to the 3DS challenge. Here’s the test card information:
Card Number: 4444333322221111Expiry Date: Any valid future dateCVV: 123Name: Any random name
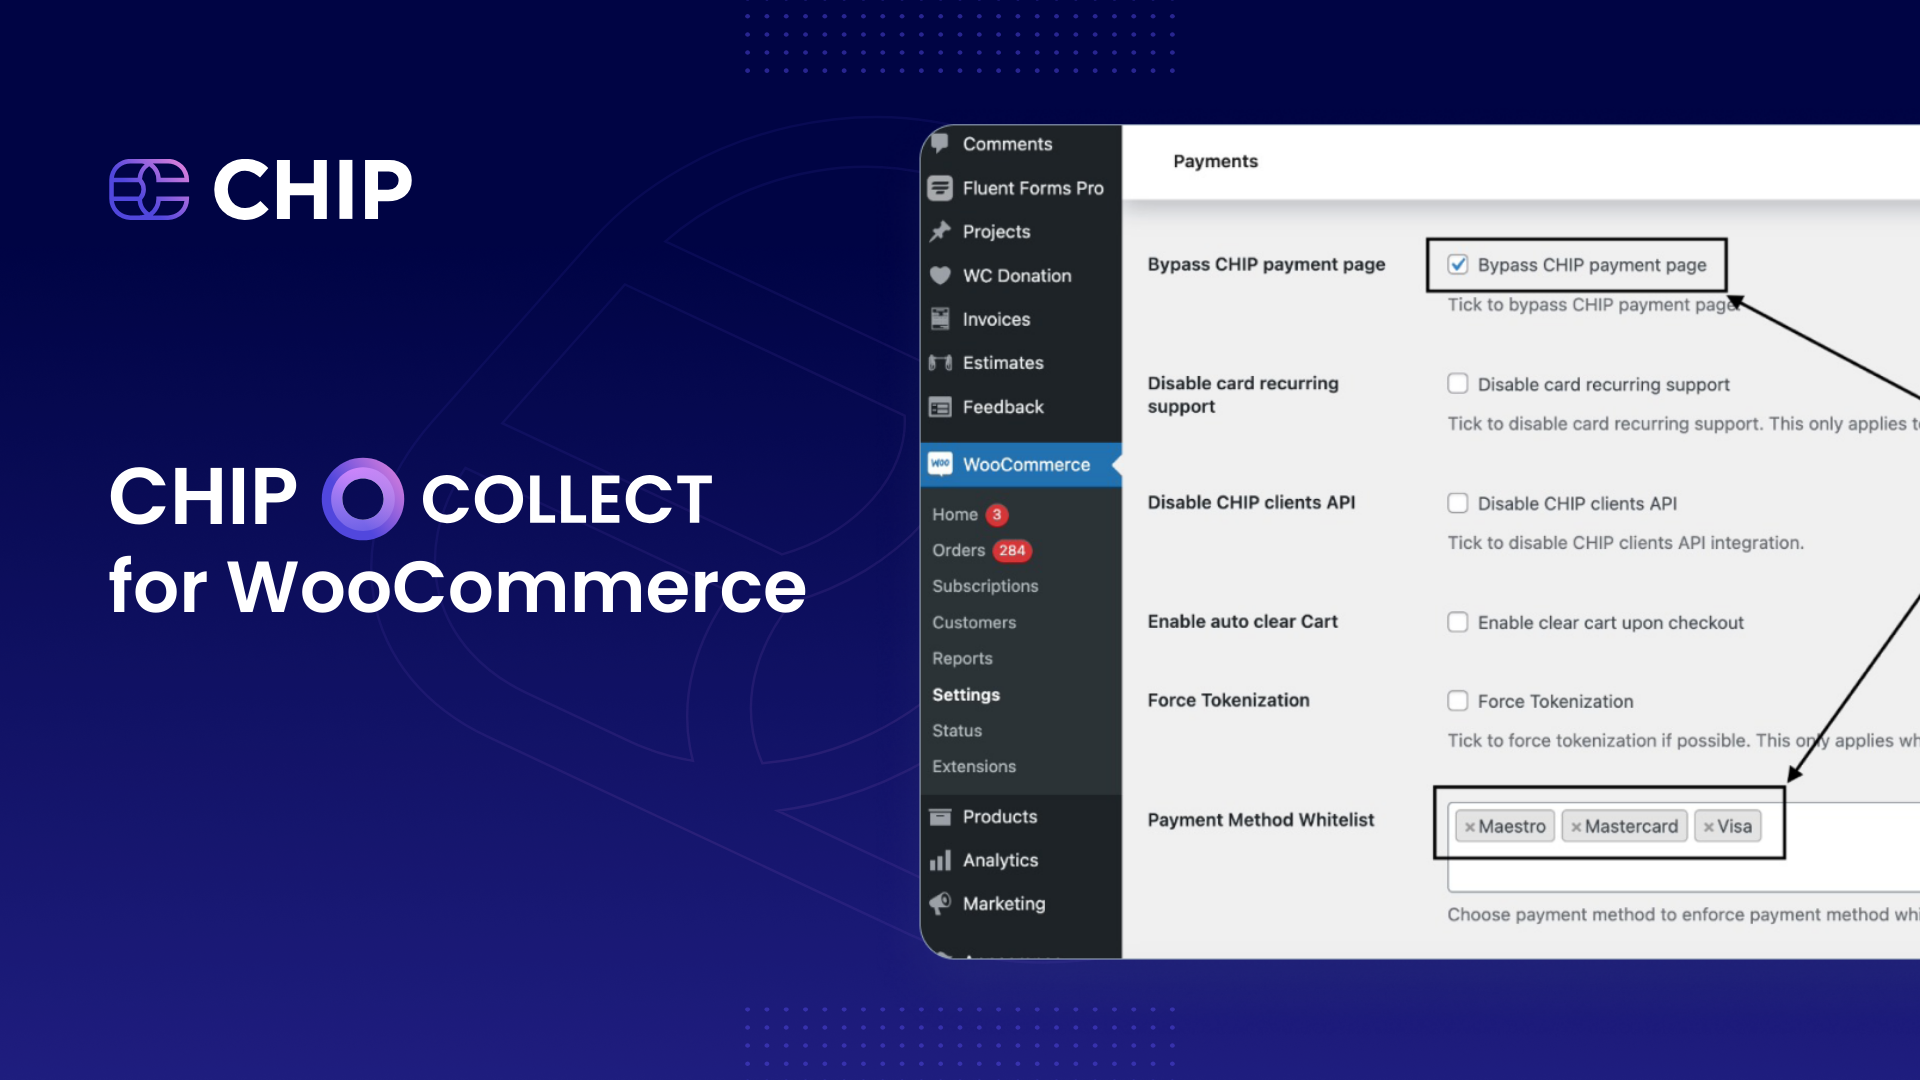
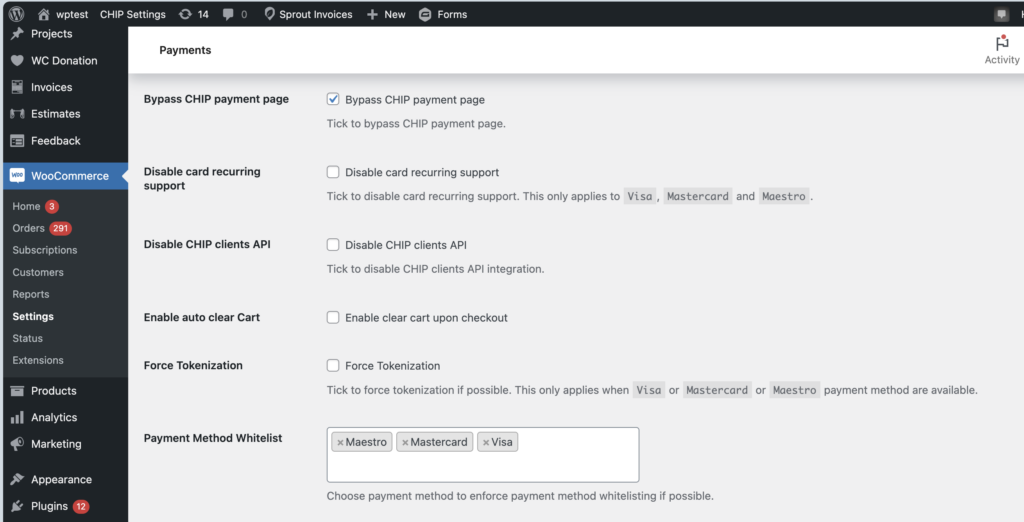
Note: In this tutorial, we've ensured that 'Bypass CHIP payment page' is enabled and the 'Payment Method Whitelist' includes Visa and Mastercard in the CHIP for WooCommerce settings.
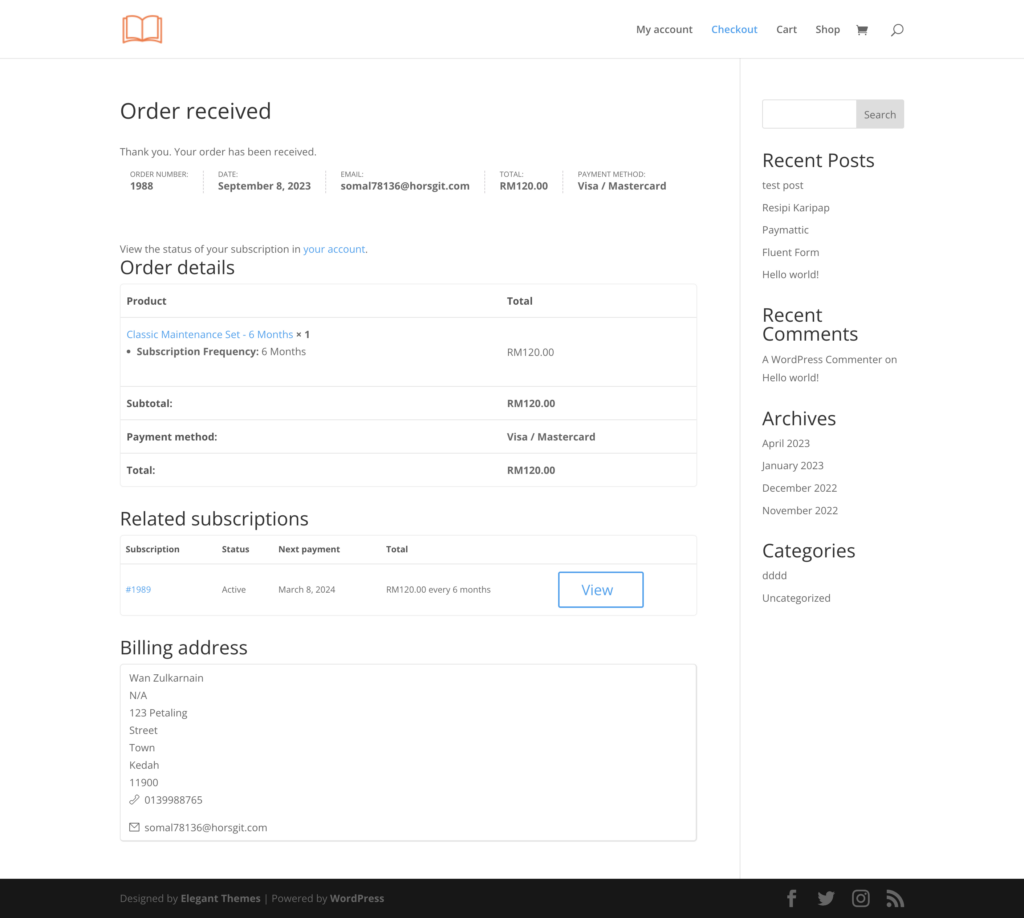
Upon a successful transaction, CHIP will route the user back to the WooCommerce site.
In summary, to set this up, ensure you have the following plugins installed:
Key Points to Remember
- WooCommerce One Page Checkout enables customers to select products, proceed to checkout, and make payments, all on a single page.
- CHIP for WooCommerce version 1.4.0 and subsequent versions deliver a genuinely comprehensive one-page checkout experience.
- This seamless process is made possible by the CHIP API: Direct Post and the Skip Payment Page features.
Recommended related topic
Read: CHIP Collect – CHIP for WooCommerce: initiate refund to customer
We’re always open to content contributions from our community. Join our Facebook Group and share your work or topic ideas to potentially be featured on our blog.
Moreover, if you have suggestions for our upcoming features, we’d love to hear them! Share your Wishlist with us.
Don’t forget to like and follow us on our social media platforms if you haven’t yet. You can find us on Facebook, Twitter, Instagram, and LinkedIn. We appreciate your support! 🙂